
How to Create a Bitcoin Donate Button

Accepting Bitcoins on your website has become one of the most popular and easy ways to transact currency from site visitors to site owners. It’s fast, inexpensive, and doesn’t require a payment processor. It’s especially popular with charities — over 10,000 charities including Wikipedia — accept Bitcoin donations on their website. Payment buttons are extremely easy to create and implement on any website.
Blockonomics has allowed e-commerce and charity site owners to accept Bitcoin directly to their wallets since 2015. With Blockonomics Payment Buttons, you can add a Pay With Bitcoin (or Donate Bitcoin) widget on any page of your website. You can try a demo out here.
Here’s how to set it up.
1. Create a free merchant account on Blockonomics
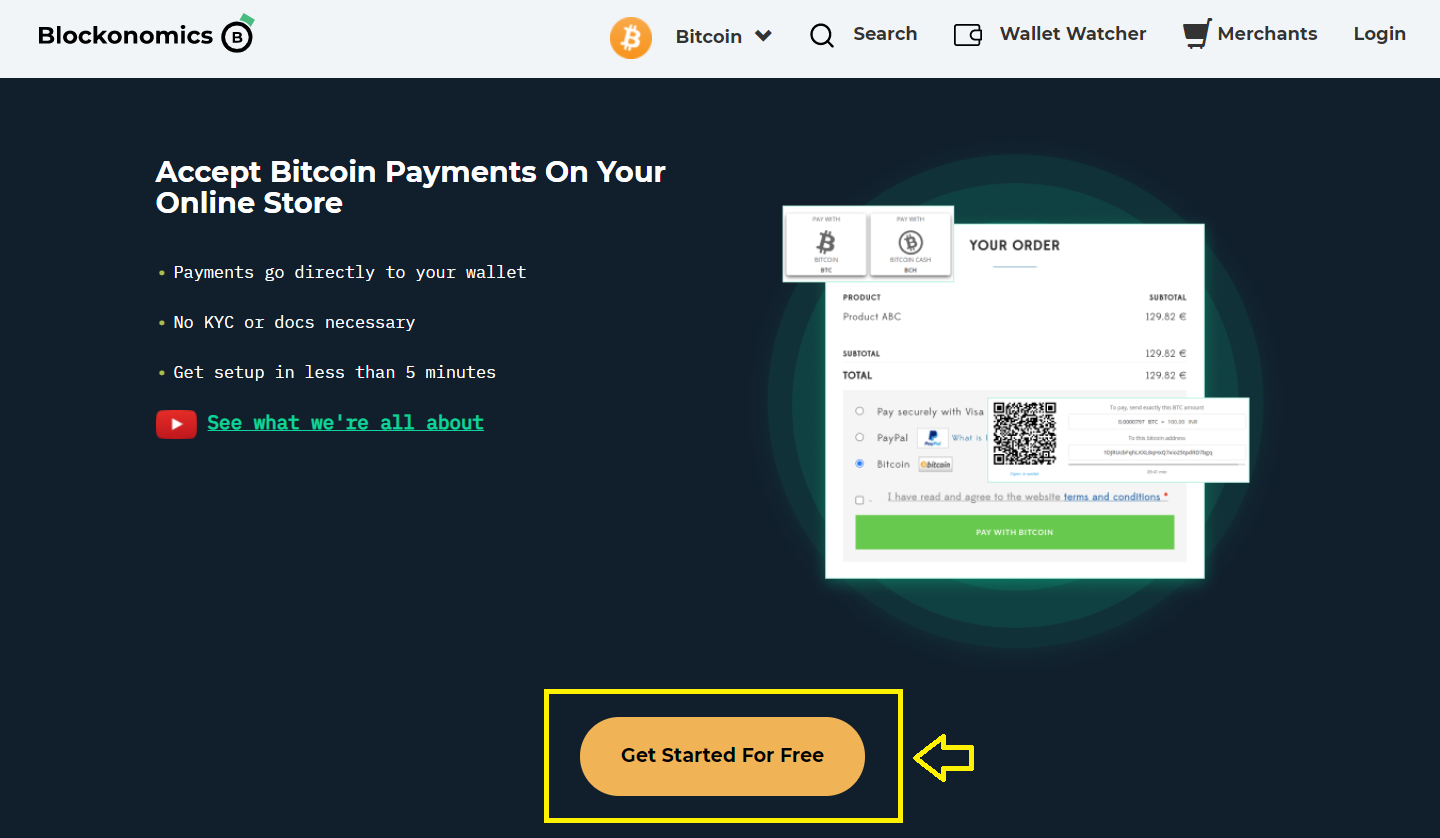
Head on over to Blockonomics Merchant page and click on the ‘Get Started for Free’ button.
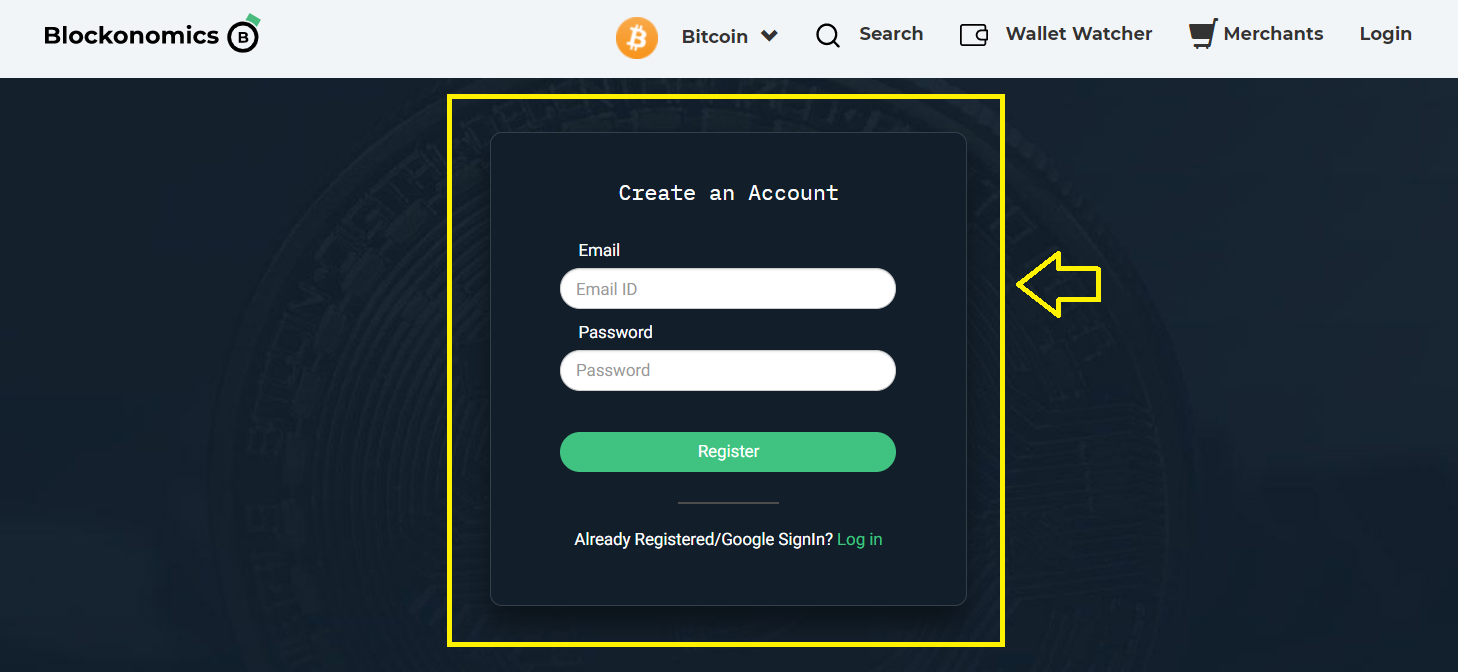
You will be redirected to a Sign-Up page. Fill out your email and password of your choice and create an account (You will be asked to enter an Activation Code to activate your account).
If you already have an account, simply click on the ‘Log In’ button below ‘Register’.
2. Create your first payment button
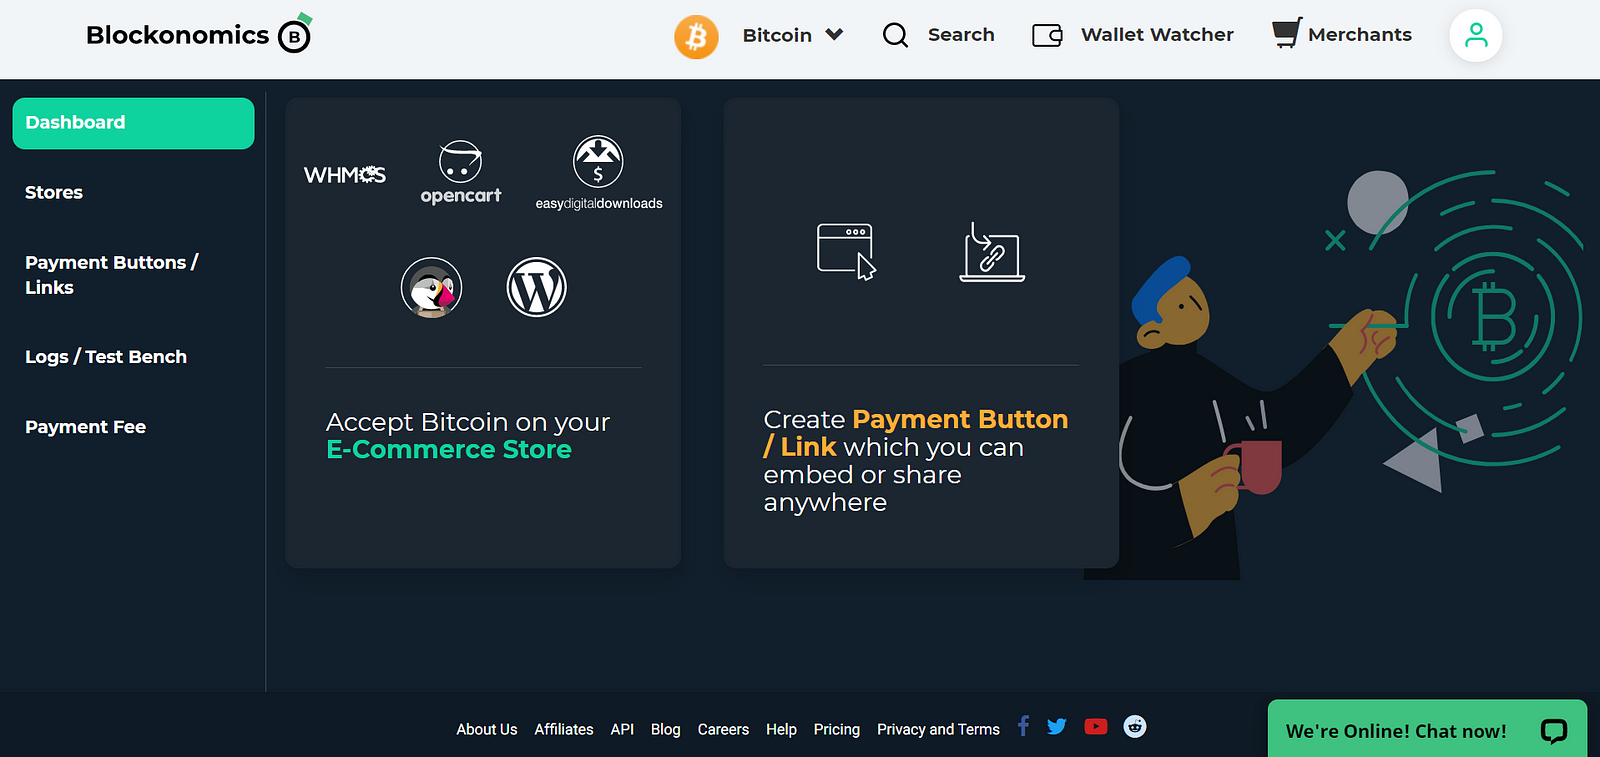
After successful registration/login you will be redirected to the Merchants page.
On this screen, you will see two options, ‘Ecommerce Store’ and ‘Payment Button/Links’. Click on ‘Payment Button/Link’
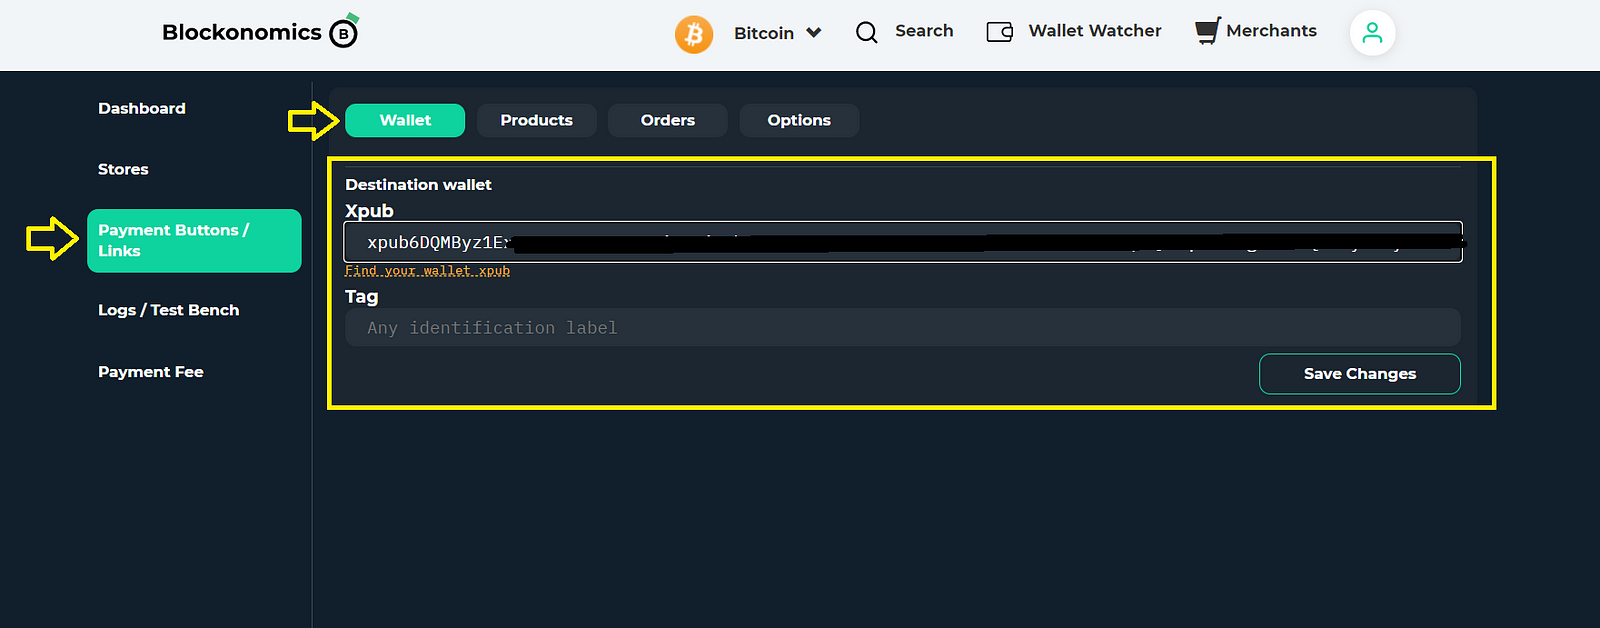
You will be redirected to the ‘Wallet’ section, enter the xPub key for the bitcoin wallet where you wish to receive payments.
Instructions to find your xPub key are available on the same page or you can refer to this article.
Then click on ‘Products’, and enter the details of the product such as name, description, etc.
The price field cannot be left blank so input any base value for the donation. The price dropdown will allow you to choose the currency that your site accepts.
Important: Check the ‘Donation Mode’ button.
Also, you can select the details you wish to collect from your customers by checking the ‘Customer Field’ menu. Make sure to leave the ‘Quantity’ field blank, as you cannot specify quantity in donation mode.
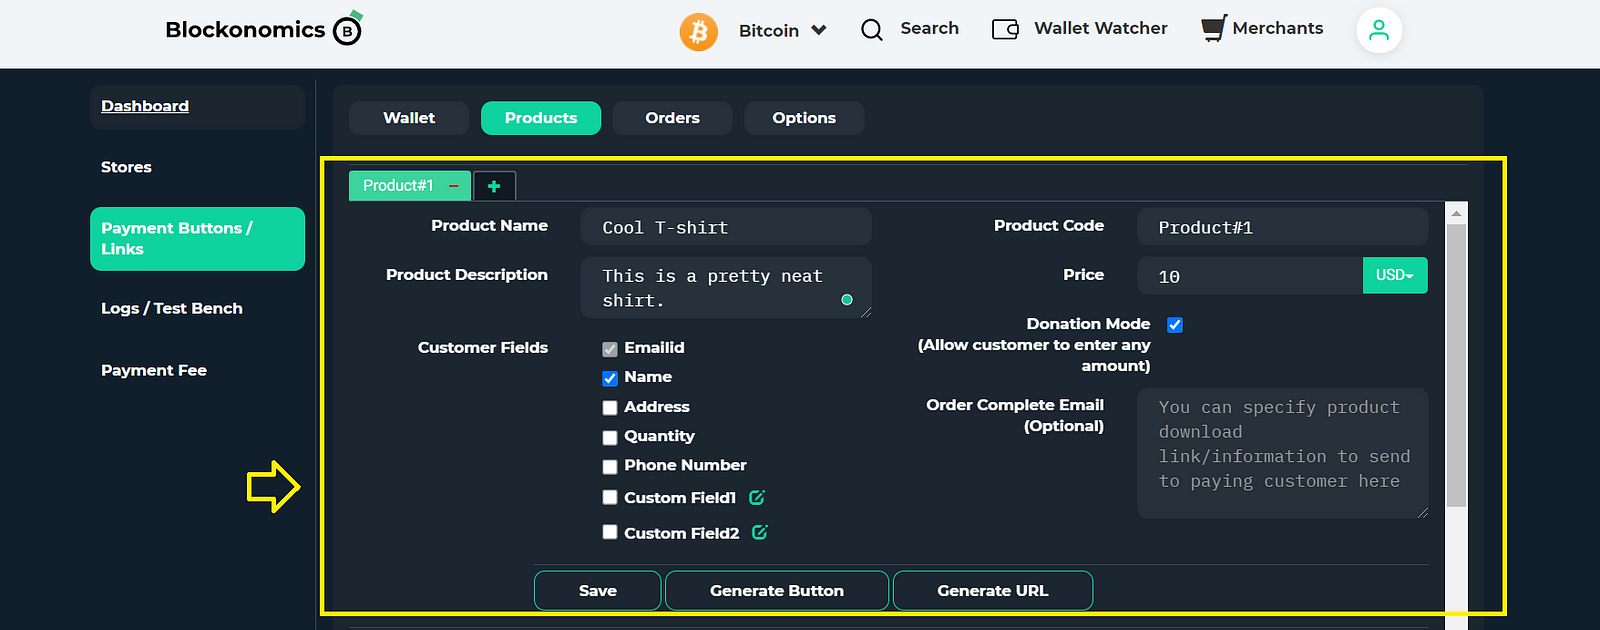
When your details are set, click Save and then click Generate Button
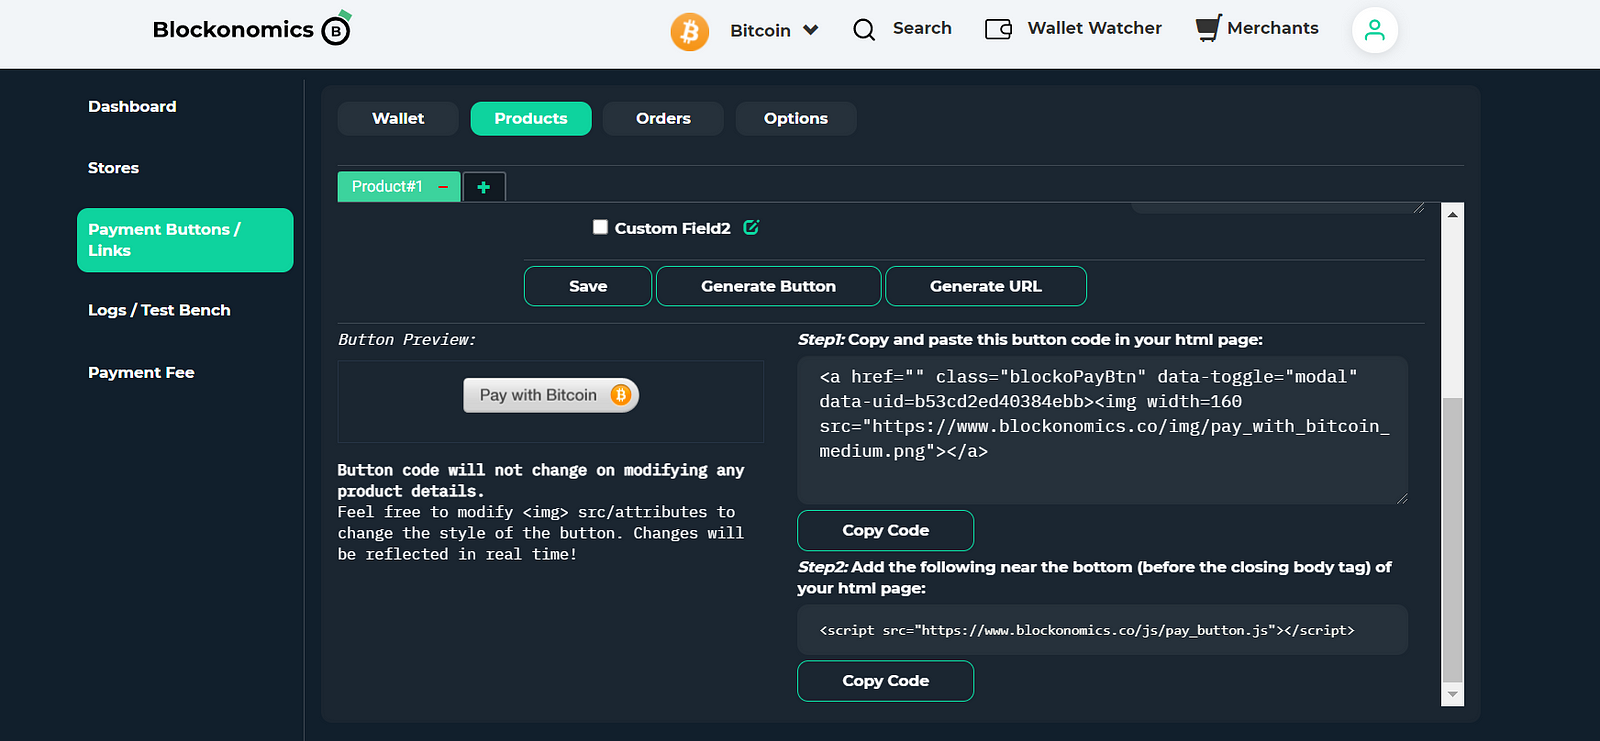
After clicking Generate Button, a preview of the button will be displayed below it, as well as the code that you will insert into your website.
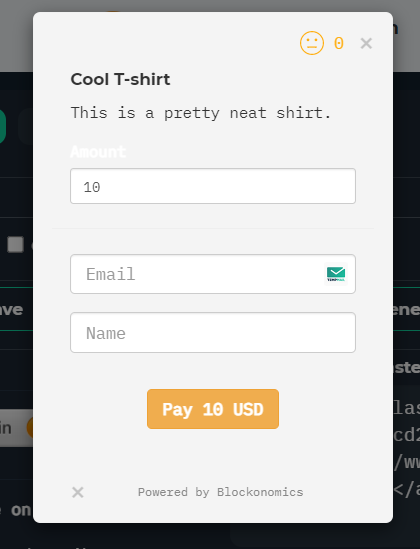
Click the Pay with Bitcoin button to test and open the payment dialog box.
3. Add the payment button to your website
The last step is easy, however, if you aren’t the technical type, you may want to pass these instructions on to your developer.
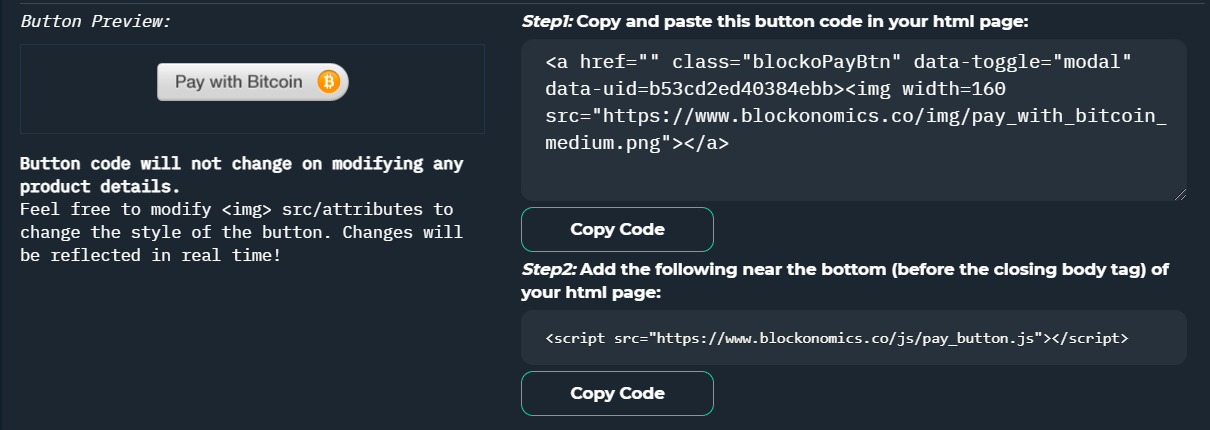
Under Step 1, click the Copy Code button to save the button’s HTML code to your clipboard. Log into your website’s admin area and open the page you’d like to add the payment button to. Paste the code exactly where you want the button to appear.
Head back to your payment button details. Under Step 2, highlight then copy the script code to your clipboard. Return to the page on your website that you have added your new payment button, scroll down to the bottom of the page, and paste the script. After saving and publishing your changes, the payment button will appear on the page.
You’re now ready to accept Bitcoins on your website — congratulations!

Comments ()