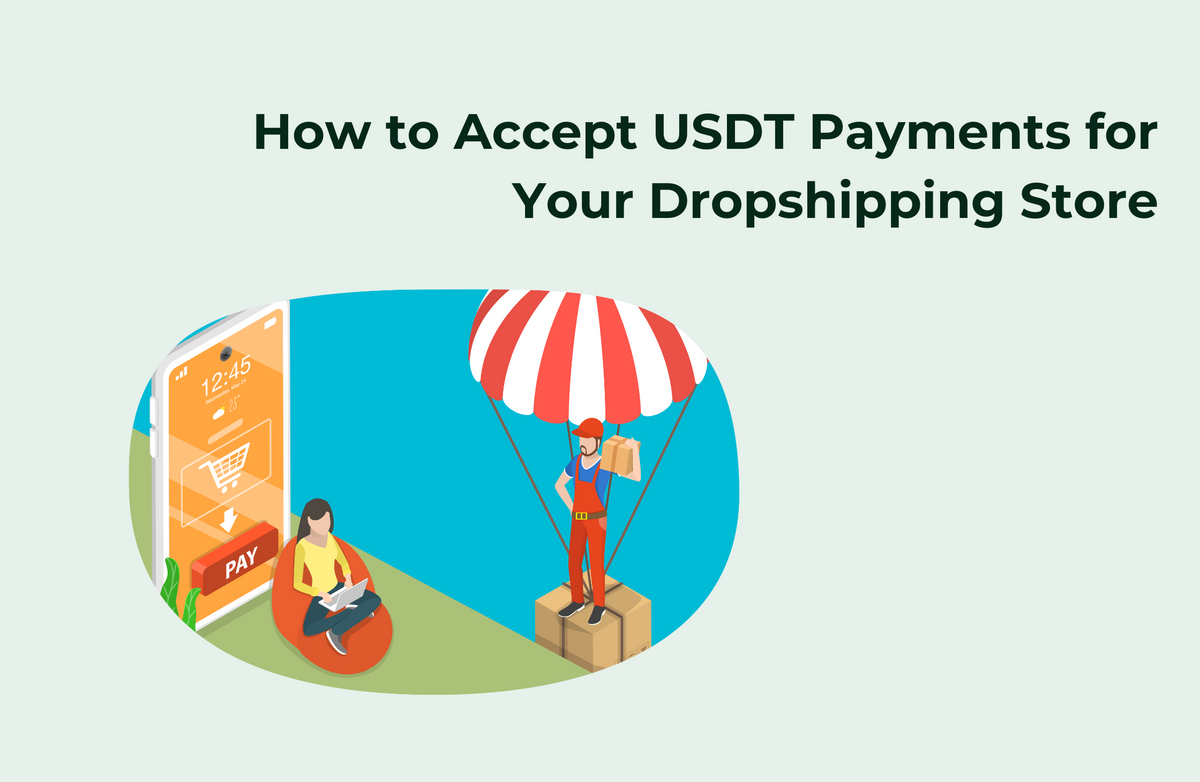
How to Accept USDT Payments for Your Dropshipping Store in 5 Minutes
Accept USDT Payments for Your Dropshipping Store in 5 Minutes – Learn how to quickly integrate USDT (Tether) payments into your dropshipping store using Blockonomics. Fast, secure, and smooth setup!
With the Blockonomics API, you can integrate USDT payments into your online store. This guide will walk you through the entire process, from setting up your account to tracking transactions, ensuring a smooth experience for both you and your customers.
Here's a video breaking this down in detail:
Table of Contents
- The Customer Checkout Process
- Setting Up Your Blockonomics Account
- Configuring Your USDT Wallet
- Configure Your Store
- Integrating the API for Payment Addresses
- Tracking Payments and Order Status
- Conclusion
- Frequently Asked Questions (FAQ)
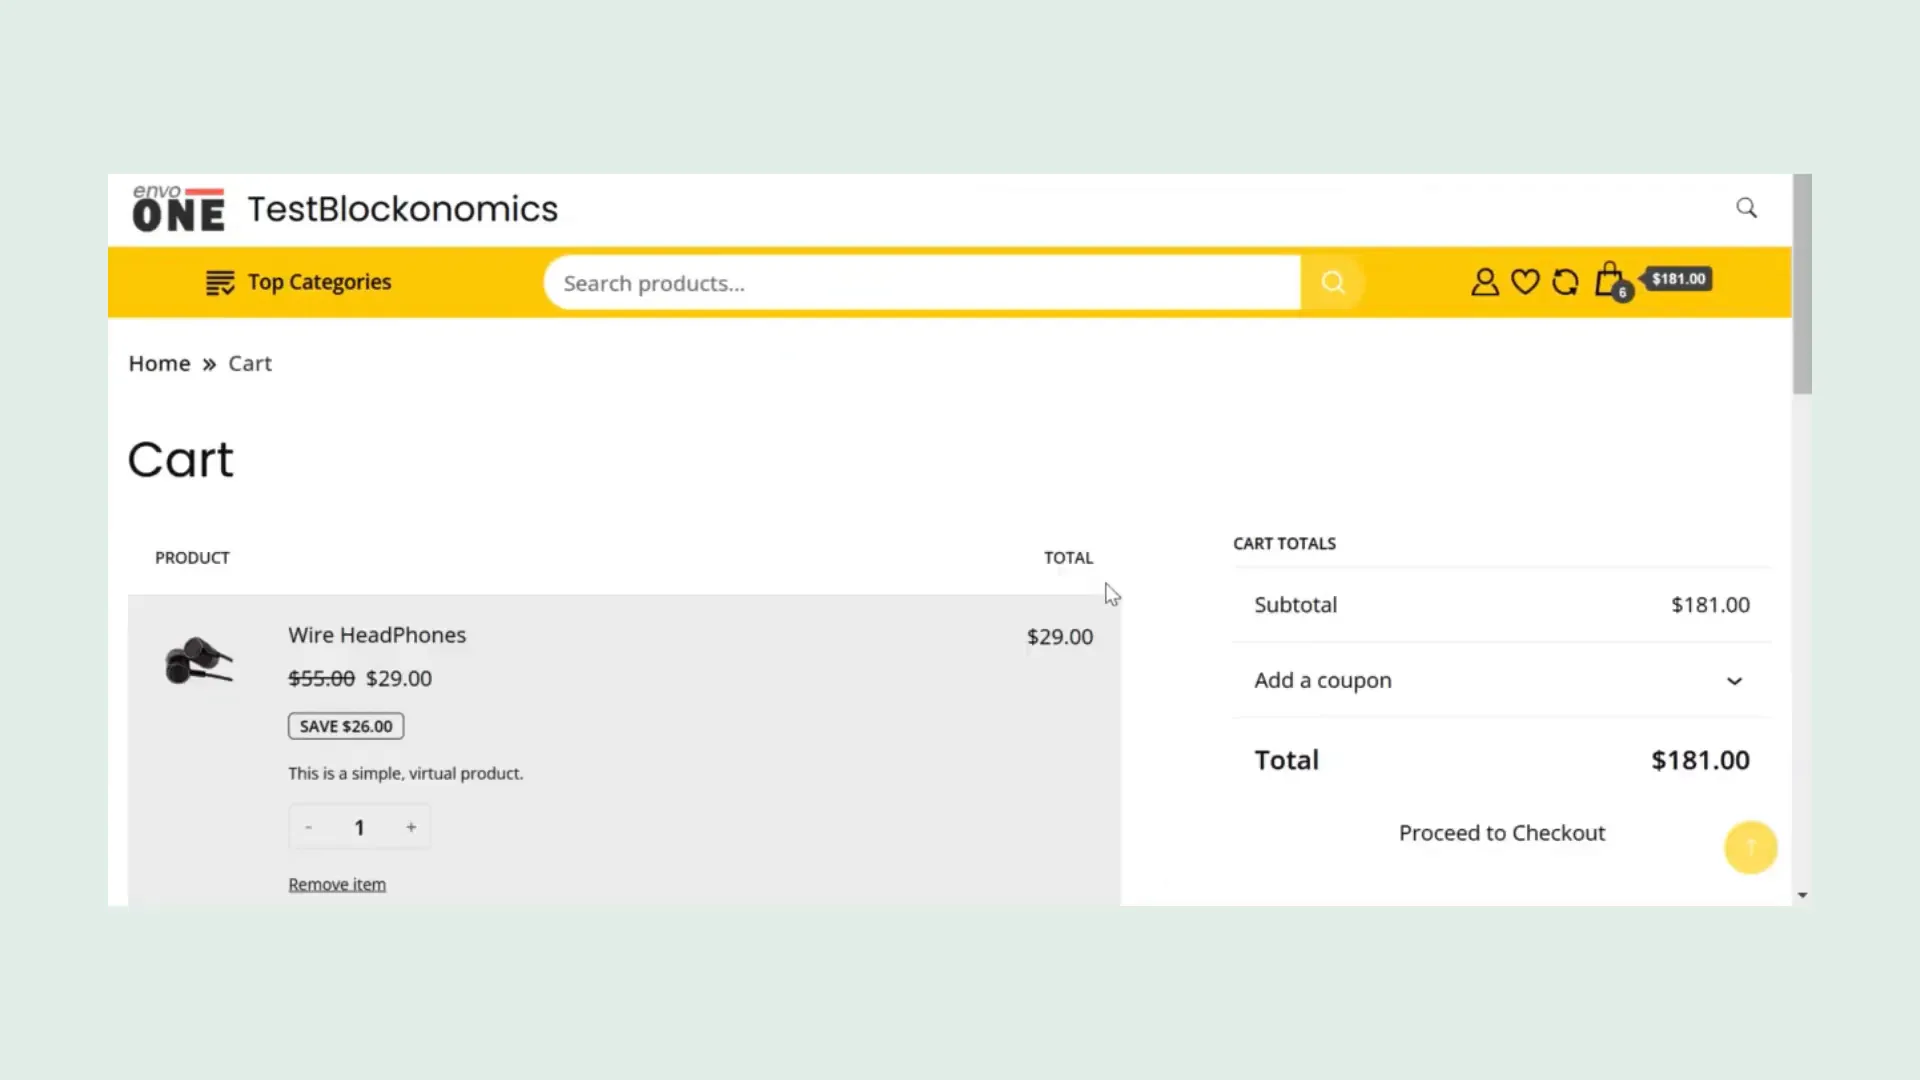
The Customer Checkout Process
Let’s start with the customer experience (the end in mind). When a customer visits your store, they’ll browse through your products and add their desired items to the cart. Once they're ready to check out, they simply click on the cart icon. On the cart page, they can review their selections to ensure everything is correct before proceeding to checkout.
During checkout, customers will be prompted to connect their crypto wallet. This is a straightforward process, and once connected, they’ll see their wallet balance along with the total amount they need to pay. This integration ensures that your customers have a smooth and secure USDT payment experience.
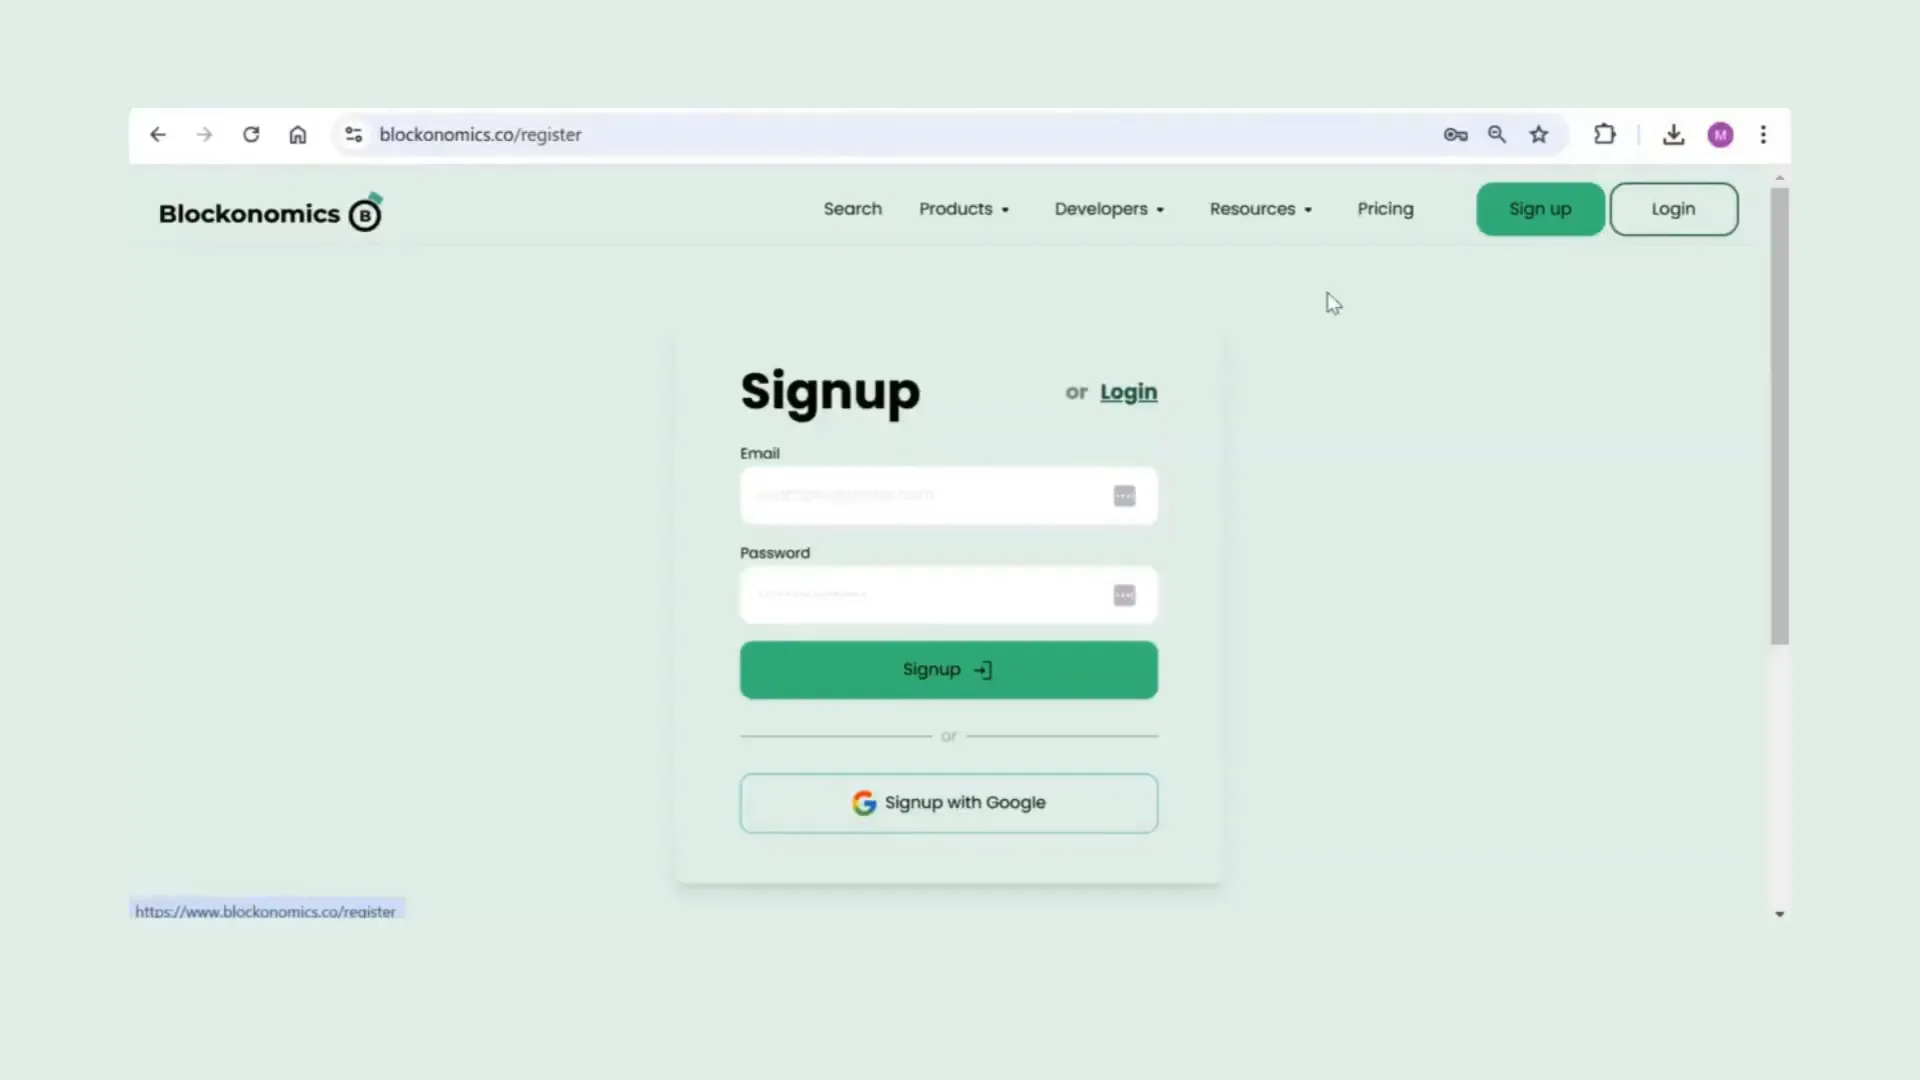
Setting Up Your Blockonomics Account
To begin, head over to Blockonomics and sign up for an account. The registration process is simple; you can either create an account using your email and a password or sign up with Google for added convenience.
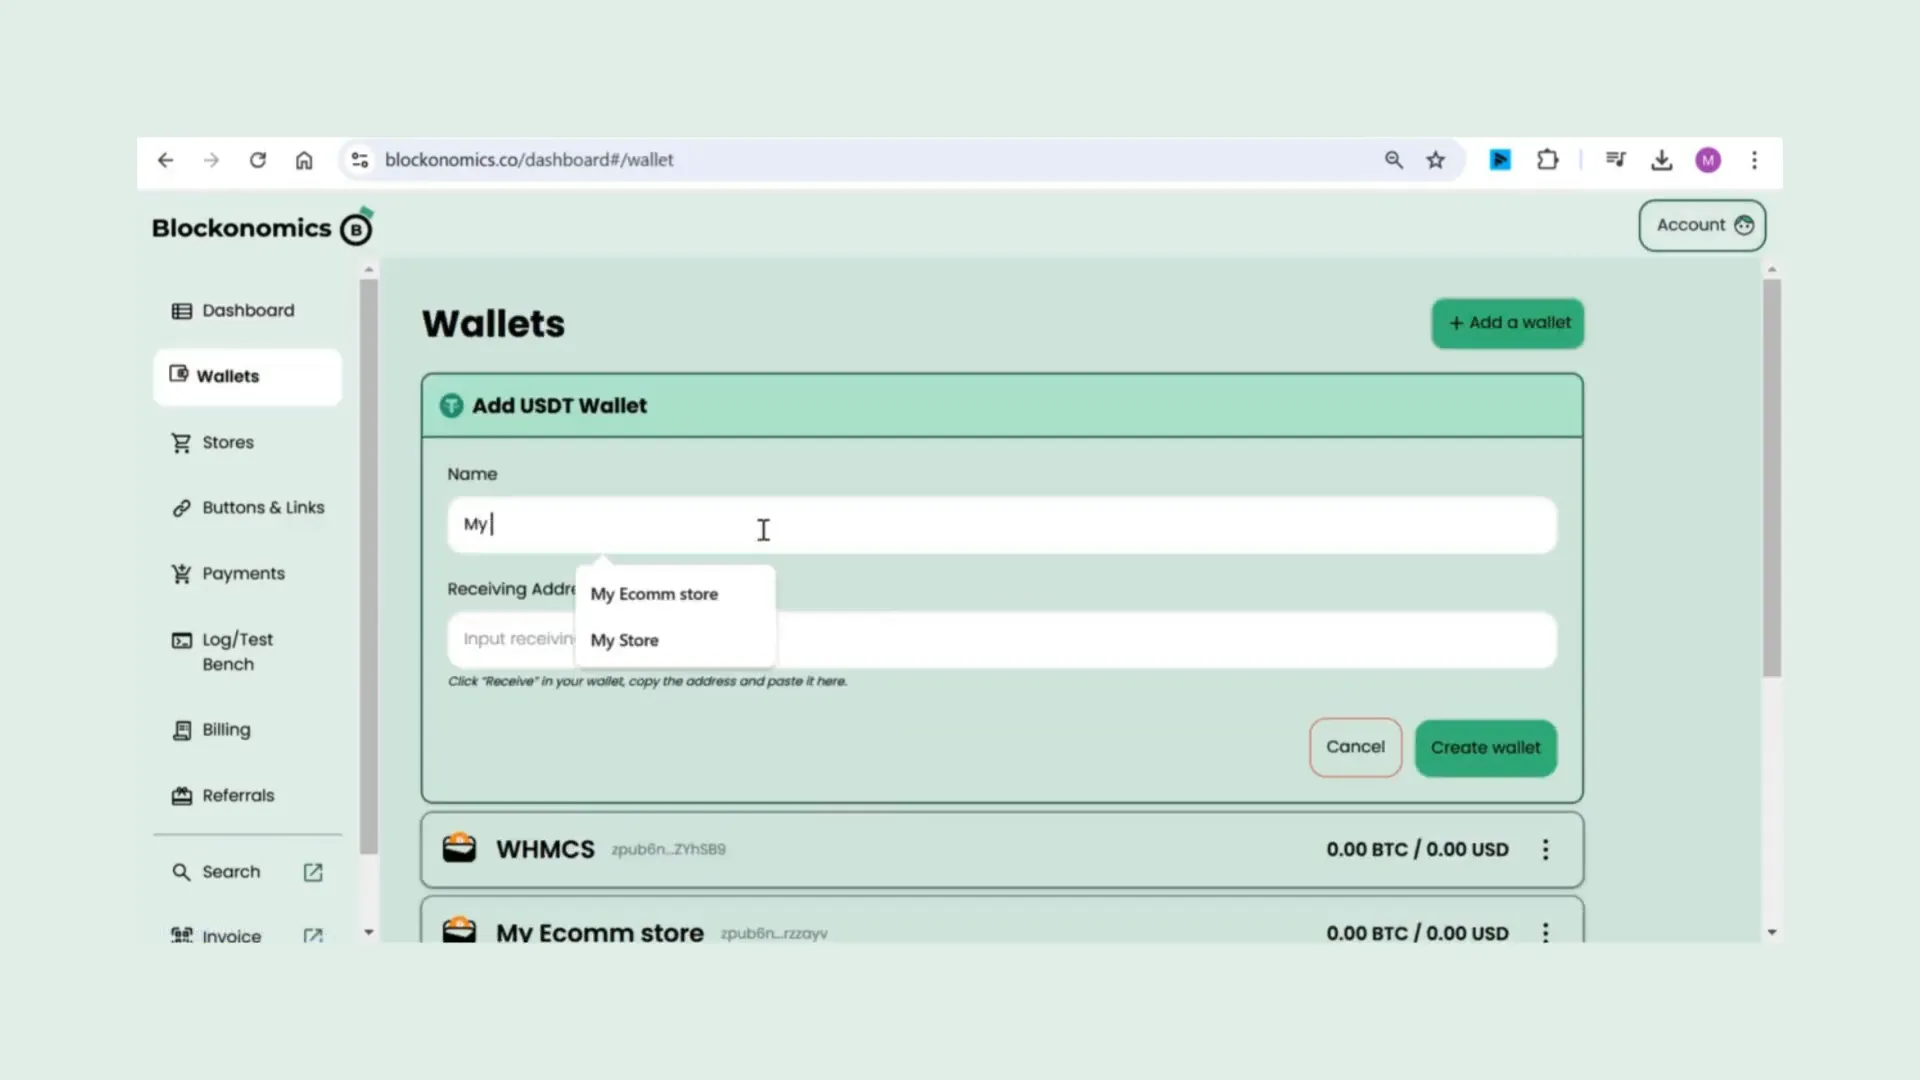
Configuring Your USDT Wallet
Once you’re in, navigate to the wallet section to add your USDT wallet. This wallet is where you will receive payments from your customers.
For this tutorial, we will be using MetaMask Chrome extension wallet. It's a popular choice among crypto users and integrates well with Blockonomics.
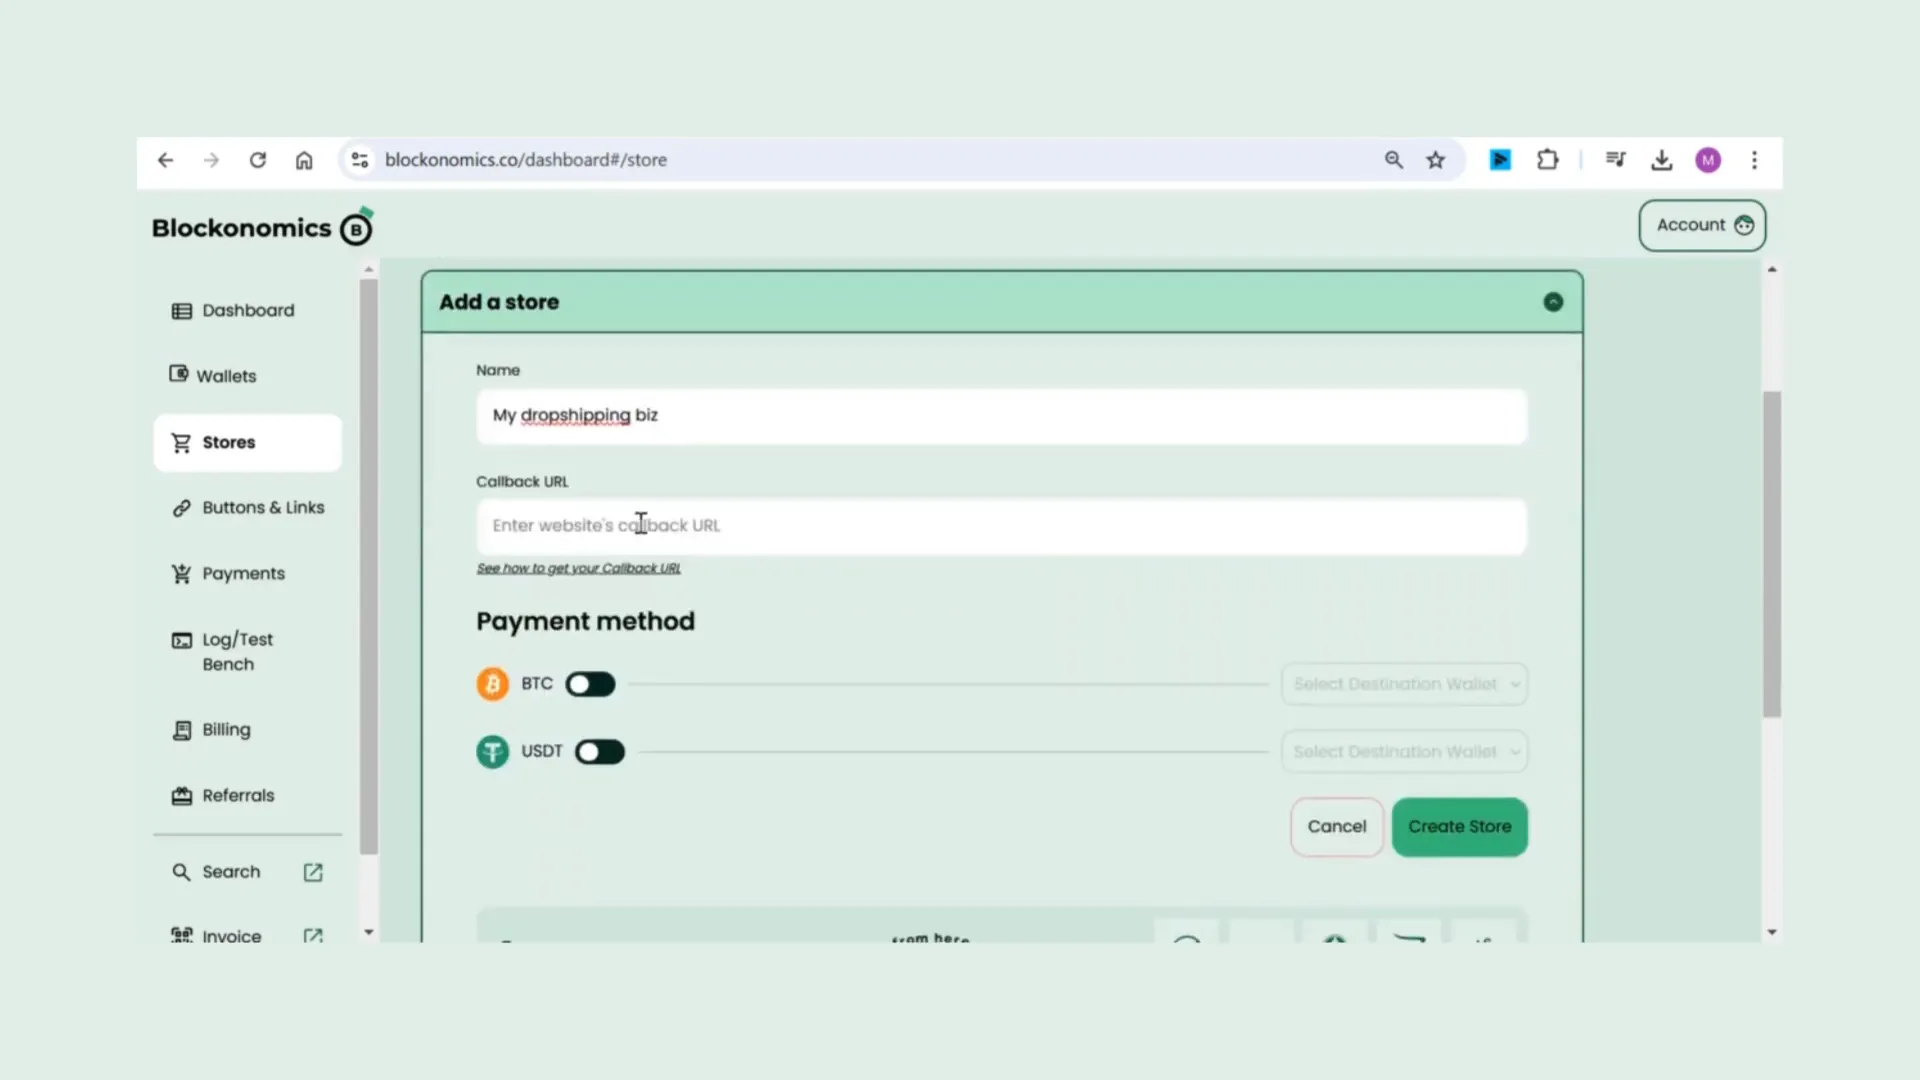
Configure Your Store
After adding your wallet, the next step is to configure your store. Go to the stores section within your Blockonomics account. Here, you will create your store, link your USDT wallet, and add your callback URL. This URL is crucial as it will be used to fetch the USDT payment address for your store.
To do this, you’ll need to use the new address endpoint from our API documentation. You can implement this in your backend using various programming languages such as cURL, PHP, Python, Node.js, or Ruby. Choose the one that best fits your setup.
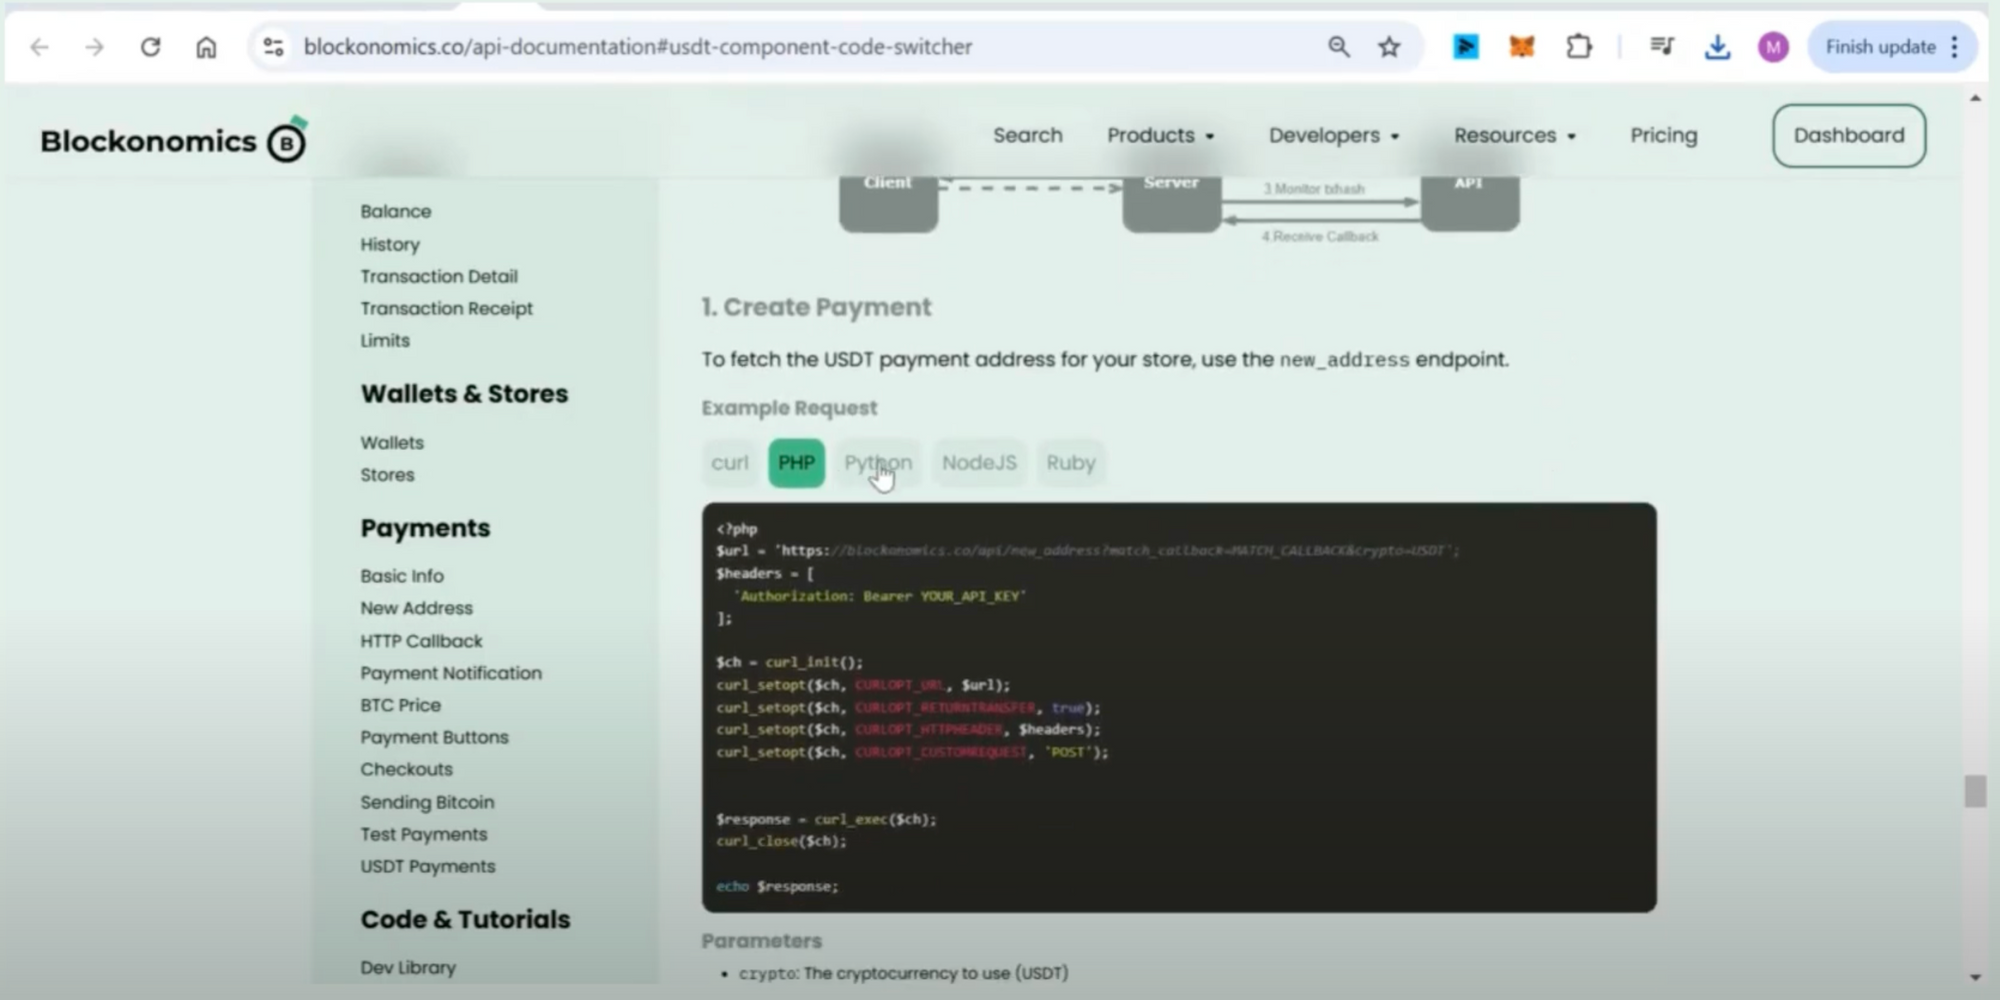
Integrating the API for Payment Addresses
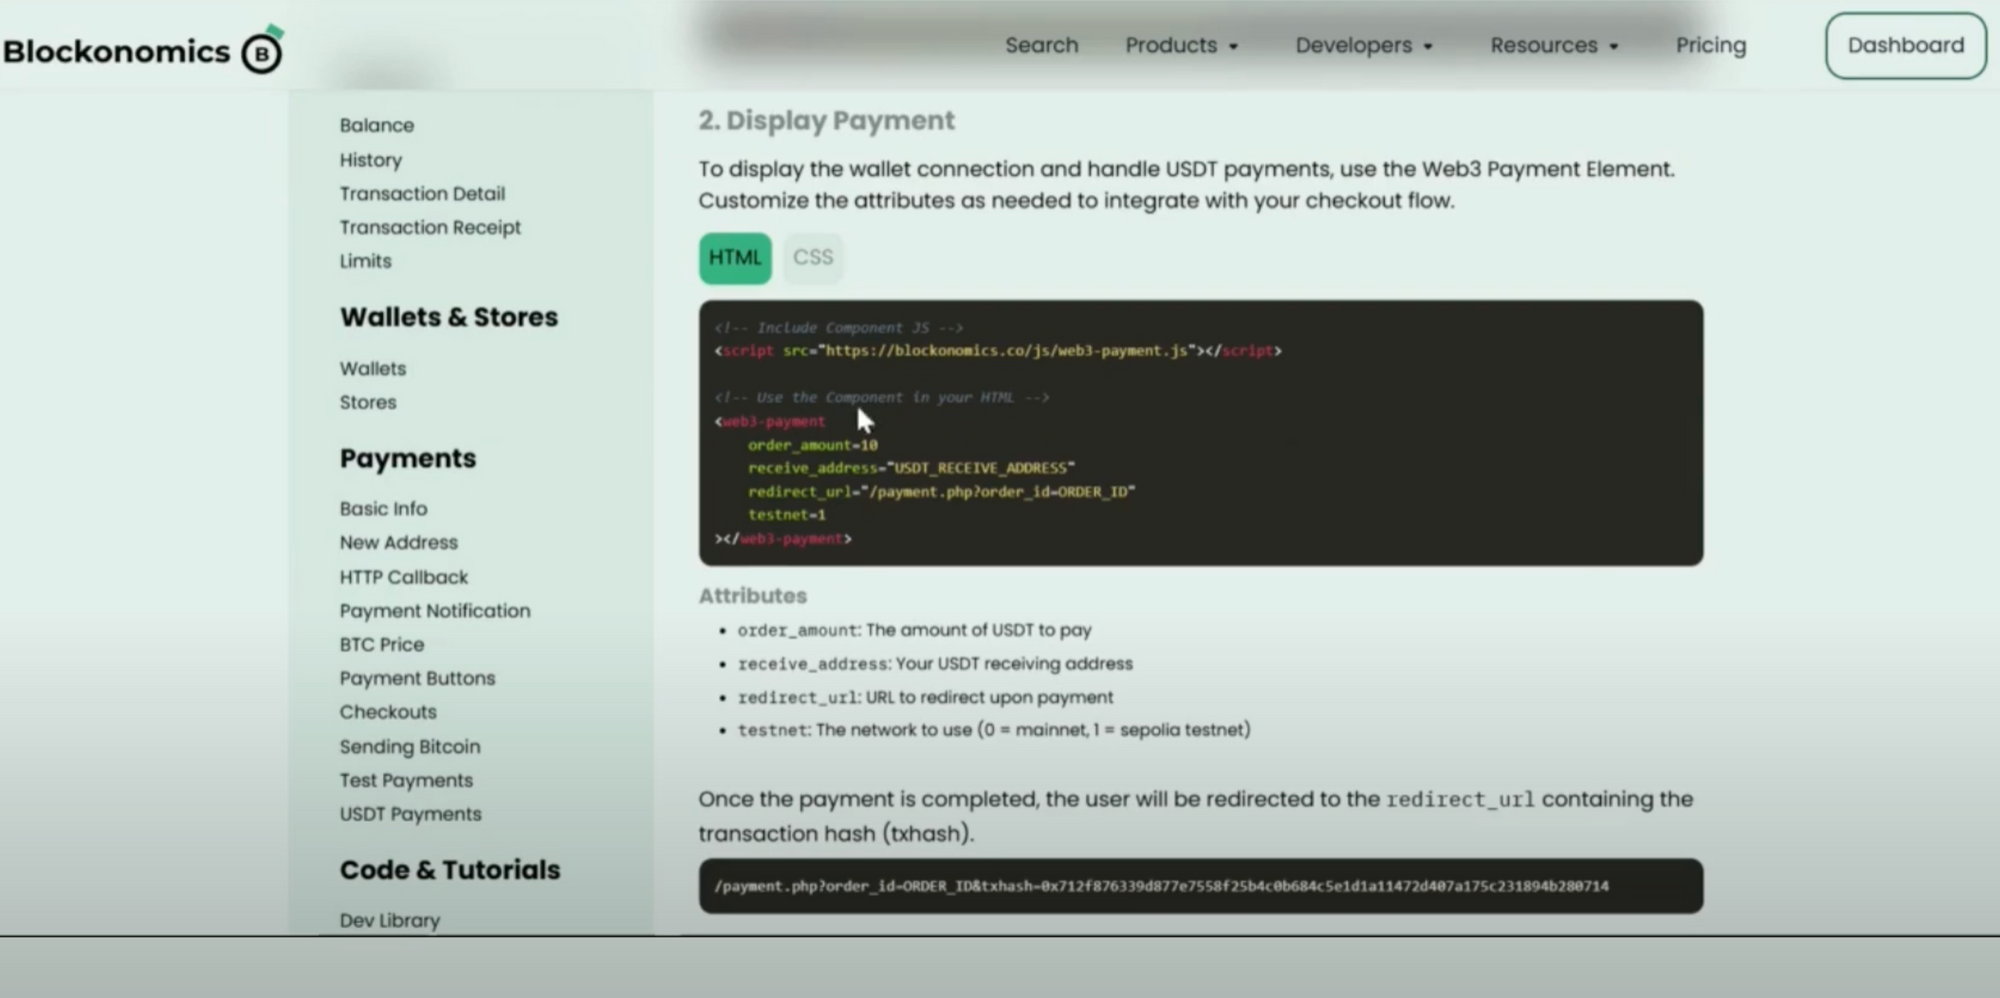
Next, you’ll need to include your API key and set USDT as the crypto parameter. To handle USDT payments, add the Web3 payment element to your site. Include the necessary script in your HTML and customize attributes such as order amount, receiving address, and redirect URL.
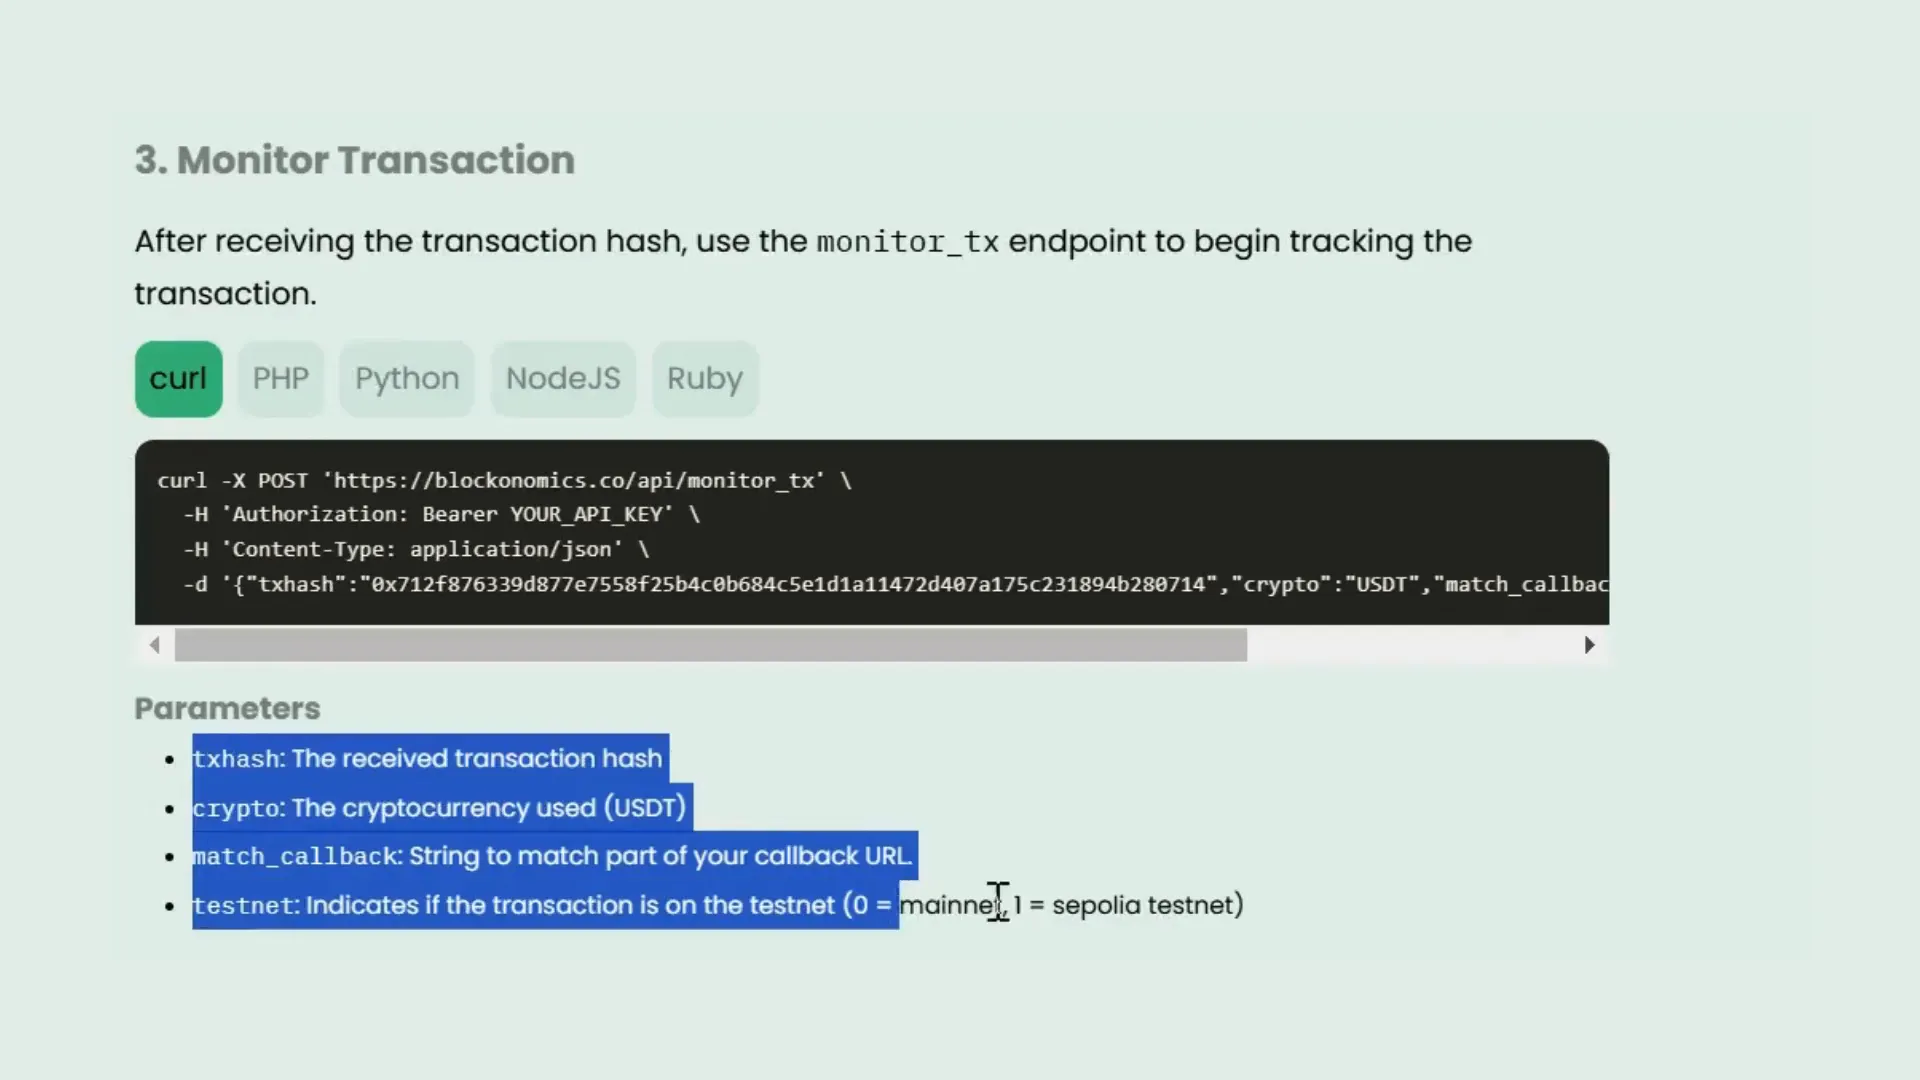
Tracking Payments and Order Status
Once the payment is completed, the user will be redirected with a transaction hash in the URL. It’s essential to extract this transaction hash and store it in your database for tracking purposes. This allows you to monitor payments and update order statuses efficiently.

Once you have the transaction hash, it’s time to track the payment. Use the /monitor TX endpoint to submit the transaction hash to Blockonomics. This step keeps your system updated on payment confirmations. Simply include your API key along with the crypto (USDT) and the transaction hash.
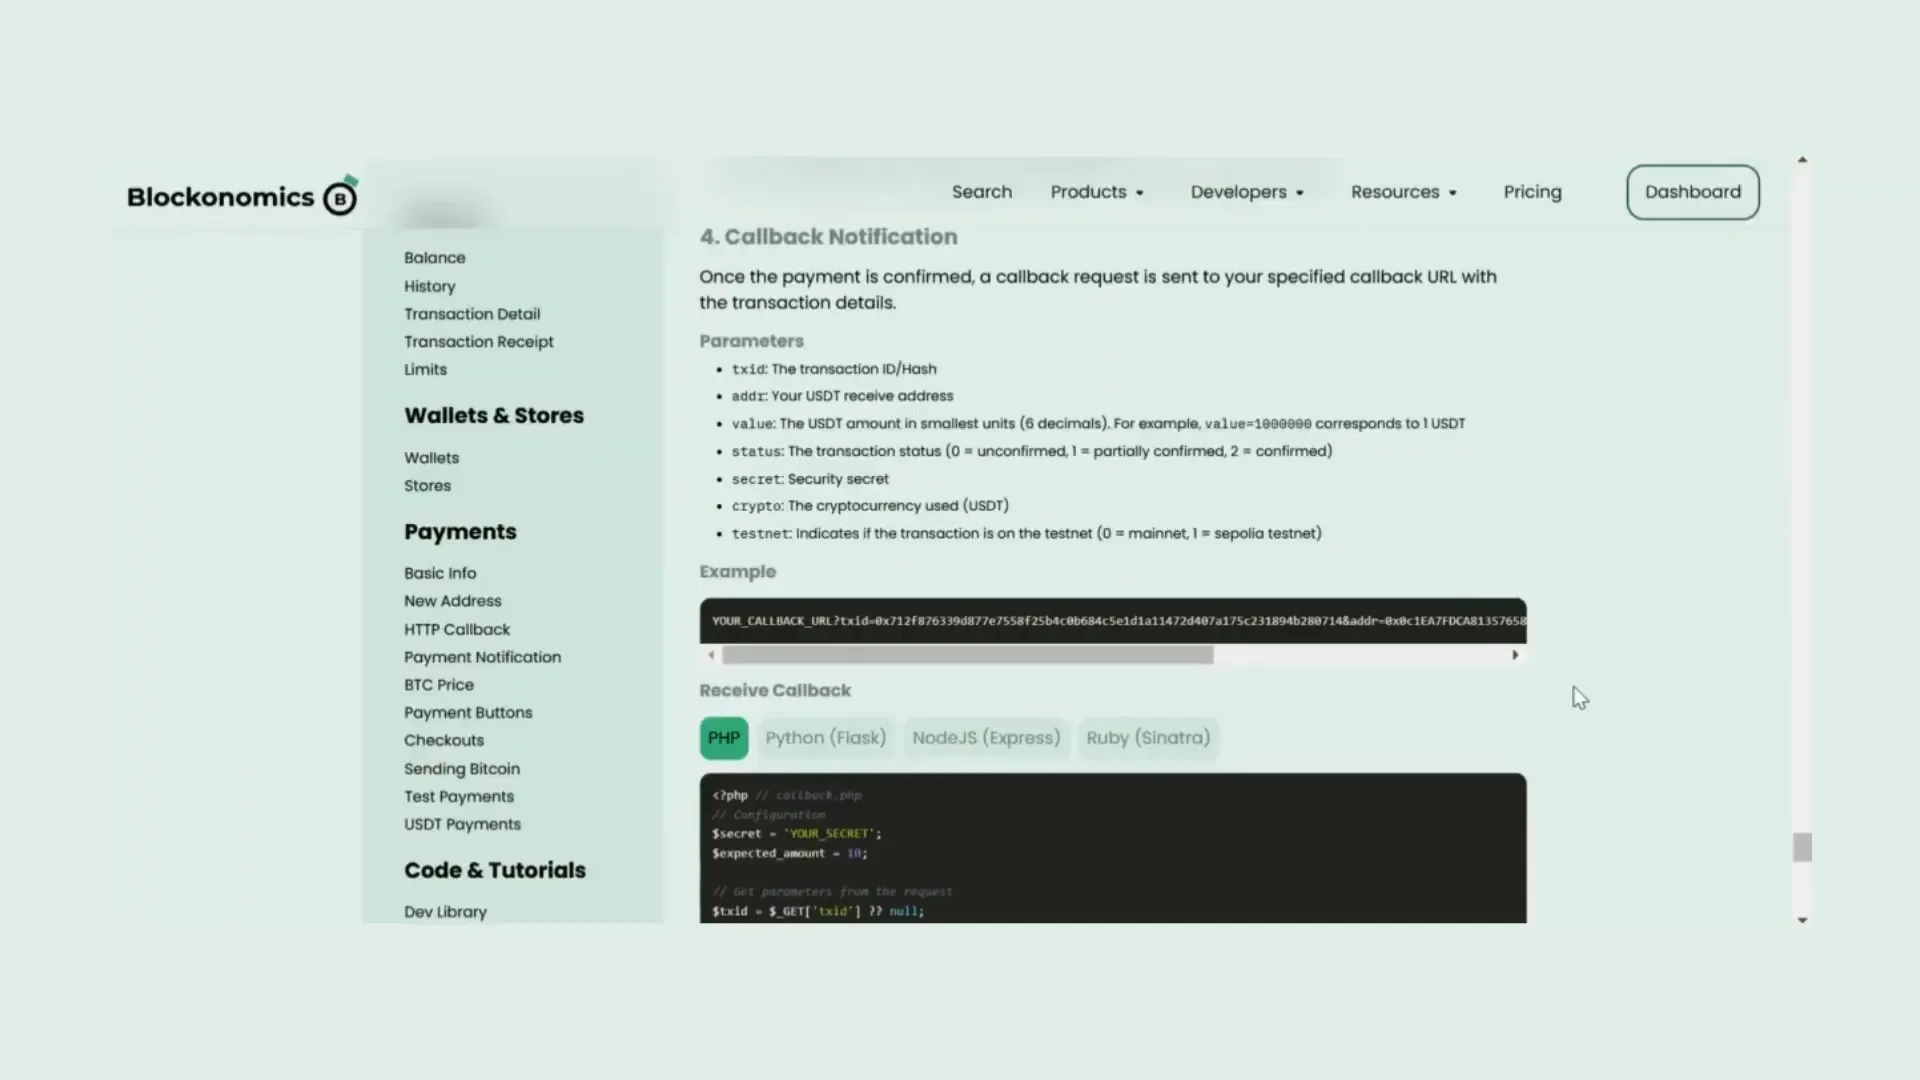
When the payment is confirmed, Blockonomics will send a callback request to your specified URL with all transaction details. This information is vital for verifying and processing the payment. Ensure that your system validates the callback data to maintain security and accuracy.
With everything set up, your customers can now enjoy a seamless payment experience. The customer journey is simple: they choose USDT as their payment method, connect their wallet, and complete the payment. This straightforward process enhances customer satisfaction and encourages repeat business.

Conclusion
To wrap up, the integration of USDT payments into your dropshipping store with Blockonomics is not only easy but also efficient. Your customers will appreciate the low fees and privacy-first approach while you benefit from complete control over your transactions. The combination of these features makes Blockonomics a standout choice for merchants looking to expand their payment options.
Frequently Asked Questions (FAQ)
1. What programming languages can I use for integration?
You can integrate the Blockonomics API using multiple programming languages, including cURL, PHP, Python, Node.js, and Ruby. Choose the one that aligns with your backend setup.
2. How does the payment tracking work?
After a customer completes their payment, you’ll receive a transaction hash. You can use this hash to track the payment status through the Blockonomics API, ensuring that your records are up-to-date.
3. How do I set up my USDT wallet?
You can set up your USDT wallet using various services like Metamask or other crypto wallets that support USDT.
4. What are the fees associated with Blockonomics?
Blockonomics offers low fees of 1% for transactions, making it an economical option for accepting crypto payments. Additionally, the first 20 transactions are completely free.
5. Can I integrate Blockonomics with other platforms?
Yes, Blockonomics can be integrated with various platforms and APIs. Check out the API documentation for more details.
For further details, check out the [API Update: USDT Payments Now Supported!]

Comments ()