Accept Bitcoin Payments on Woocommerce: 4 Easy Steps

There are dozens of reasons to choose Bitcoin as an alternate payment method for your eCommerce customers. It skips the middle man, eliminates fraud and chargebacks, and the transactions fees are significantly lower than PayPal. Plus, PayPal doesn’t accept certain industries such as gambling and casinos, which makes Bitcoin the #1 solution.
Fortunately, Blockonomics — which helps hundreds of businesses accept Bitcoins, Ethereum, and other altcoins — offers a simple solution for integrating your WordPress/WooCommerce site.
What makes Blockonomics unique to other Bitcoin payment options? Your Bitcoin revenue goes directly into your wallet, rather than a central exchange. This generally will incur further transaction fees — plus there’s nothing safe about leaving your Bitcoins on an exchange.
What you’ll need:
- A WooCommerce-enabled WordPress site
- Free WordPress plugin
- Free account on Blockonomics Wallet Watcher
- Bitcoin wallet — we will use Blockchain.info for this example, but it’s highly recommended that you only temporarily store it there, or store your coins in a safer wallet.
Setup can be made in 4 easy-to-moderate steps. [If you’re not comfortable with getting your hands dirty, consult your technical lead first before proceeding]
You can find the video version of the steps below:
1. Install the Blockonomics WordPress plugin
Okay, this is by far the easiest step. Log into your WordPress site and type “Blockonomics” in the search bar.

Under Blockonomics Bitcoin Payments, click Install Now. After it’s been installed, click Activate.
2. Synchronize your wallet
It’s time to connect your wallet, which stores all of your Bitcoin, to your WordPress site.
You can either use your own wallet, or you can create a free one at Blockchain.info (which is what we will do in our examples below).
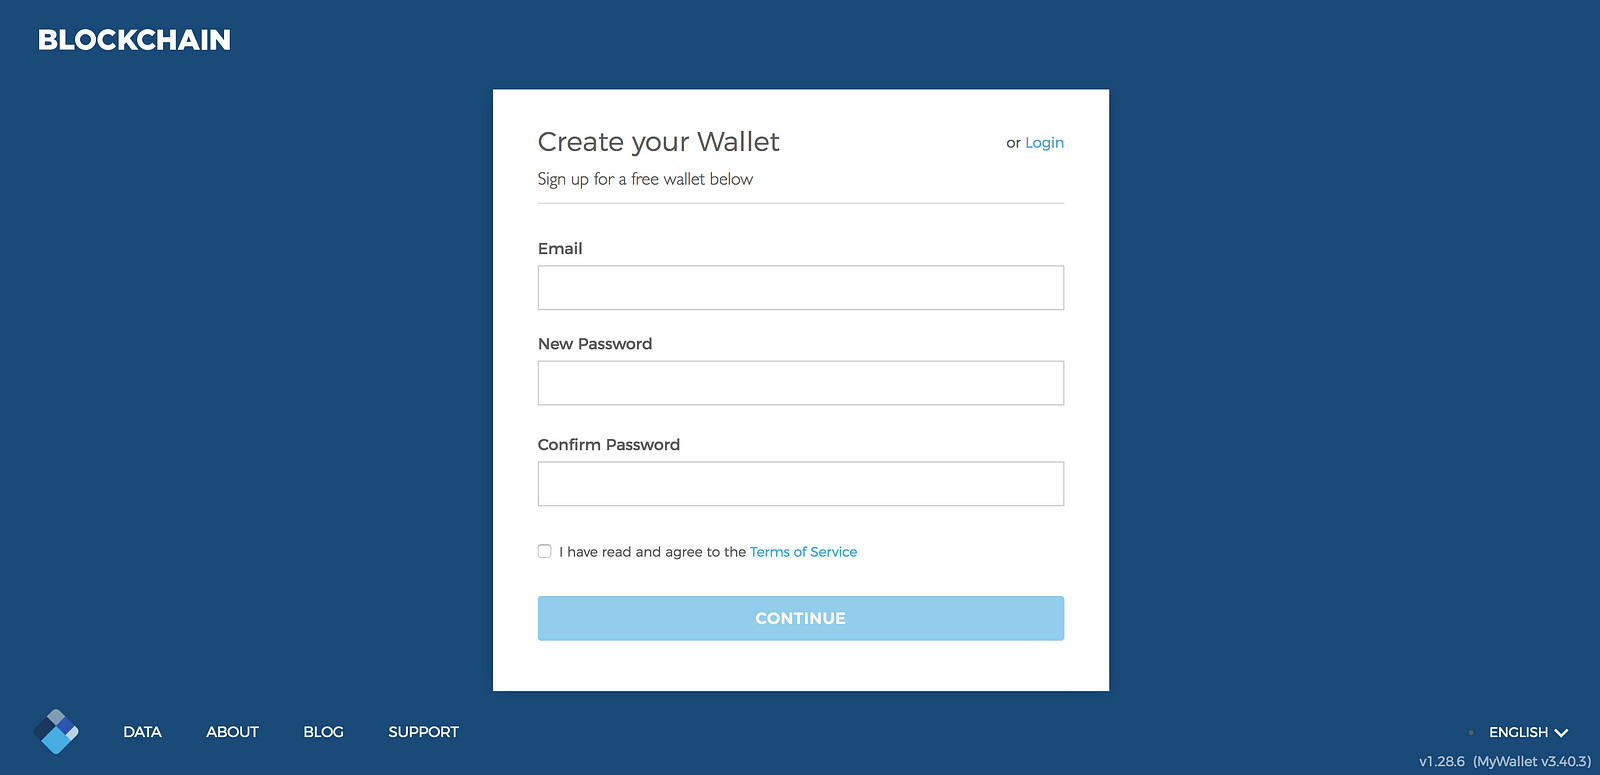
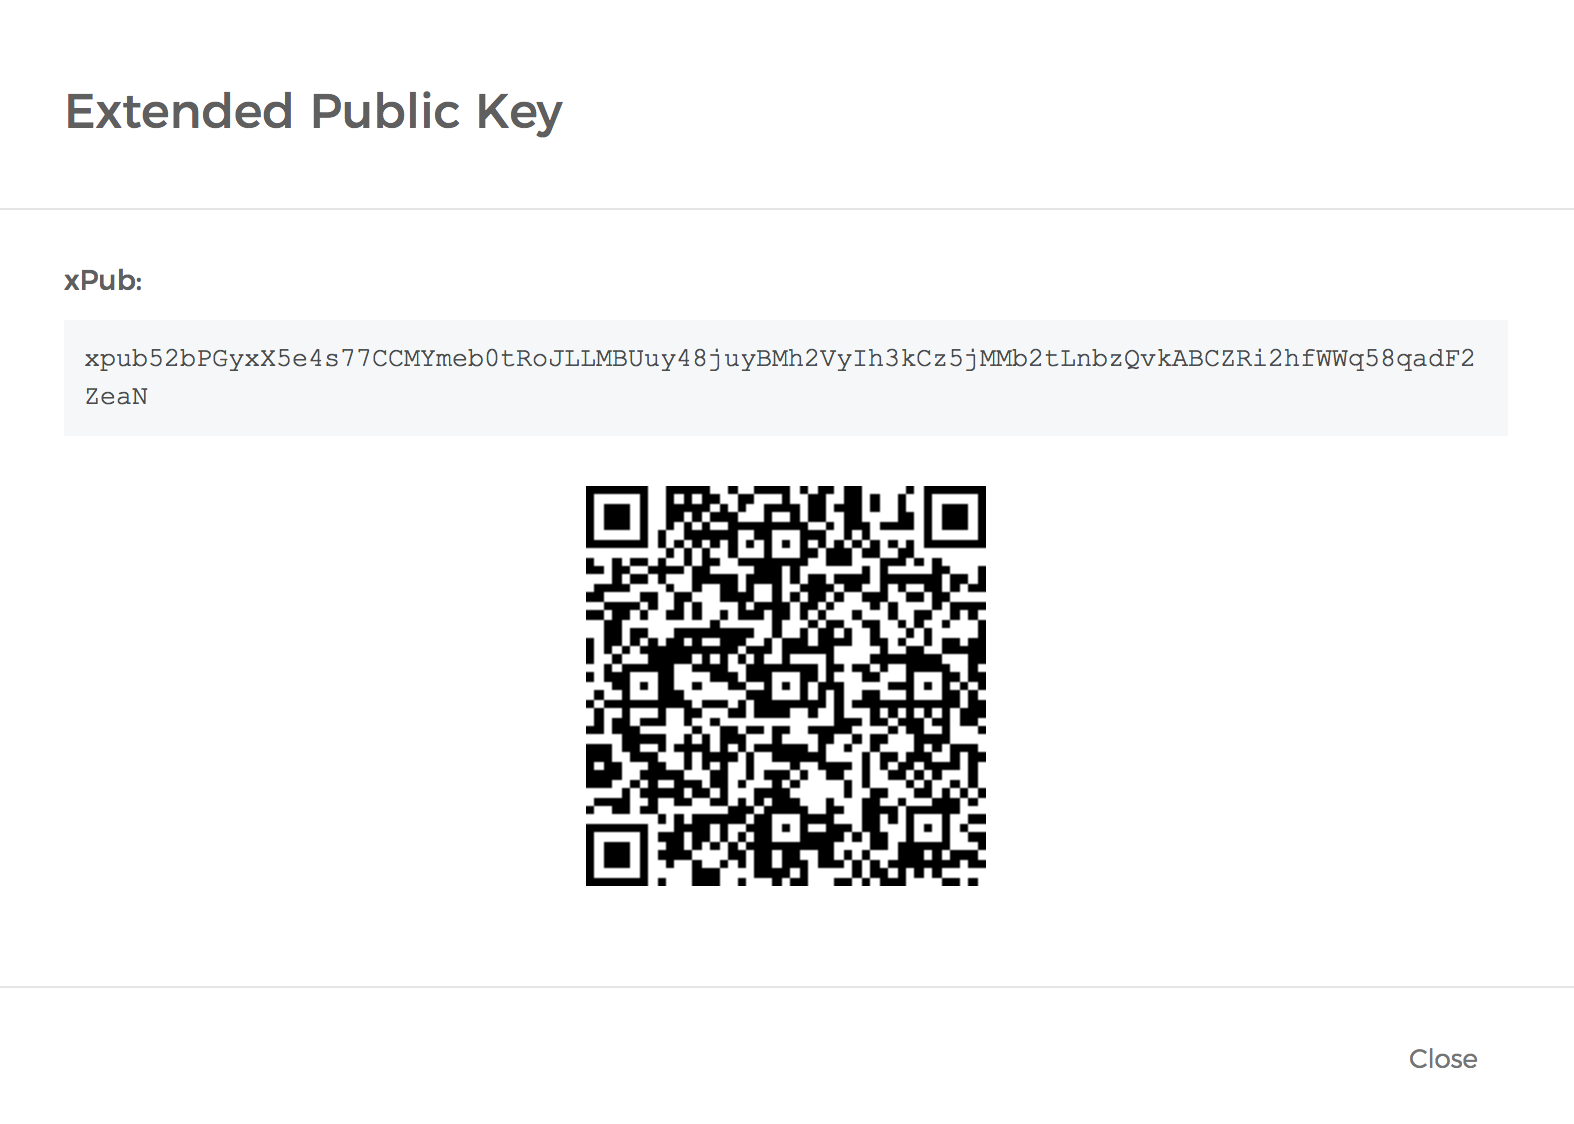
We’ll need to get the Extended Public Address, also known as the xPub. The key will act as your unique identifier that ensures your Bitcoin transactions land in your wallet. From there, you’ll be able to move your Bitcoins to another, more private, wallet, or convert them to real currency (or fiat currency).
After logging into your Blockchain.info account, click on the Settings icon on the top right corner and select Wallets and Addresses.
Under the Bitcoin Wallets section, click on Manage.

Then select More options -> Show xPub

Copy your xPub to the clipboard.
3. Setup merchant account
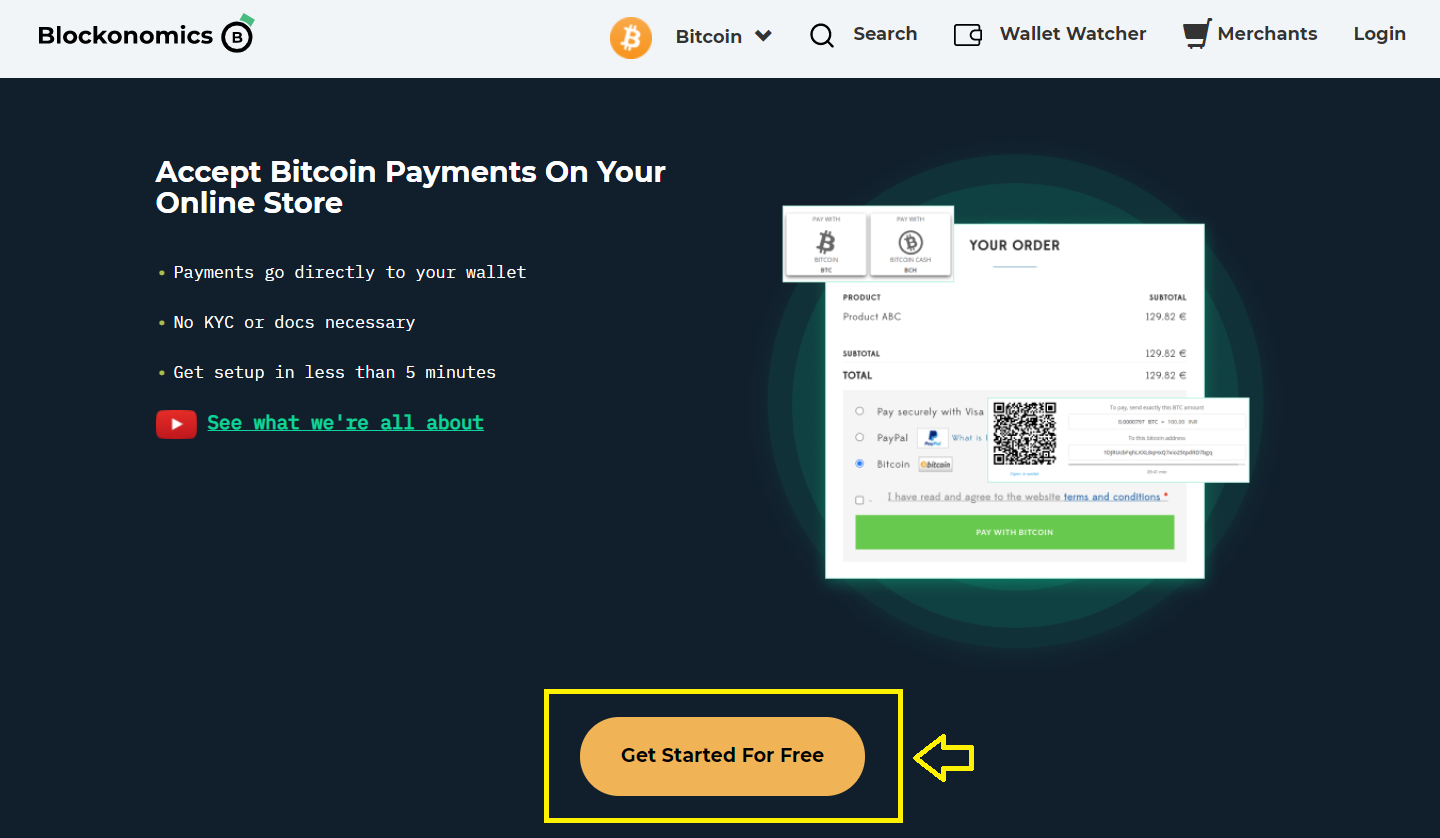
Go to Merchants -> Click on Get Started for Free. Follow Registration using your email address.
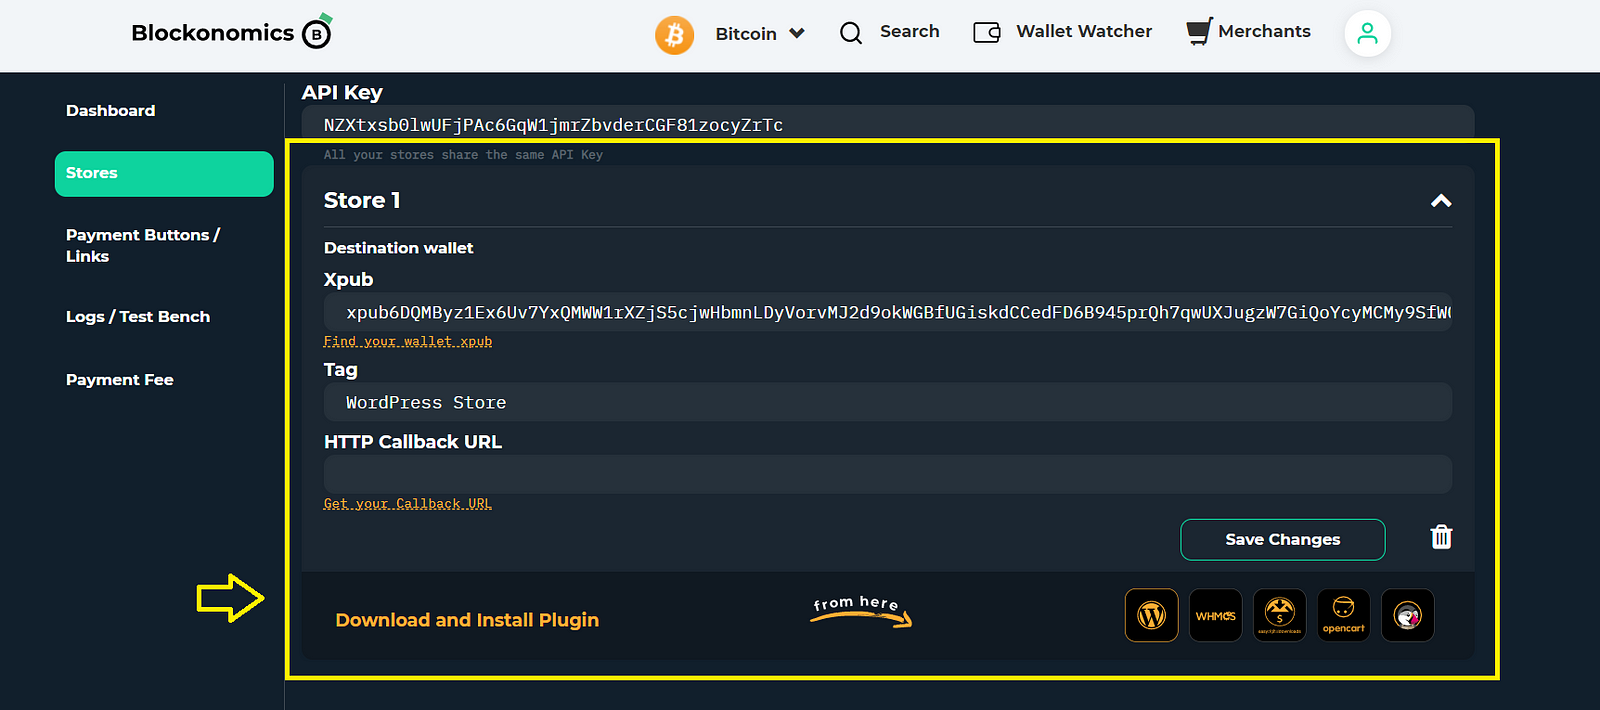
Then, head to Stores -> Add new Store and enter the xPub key you copied in Step 2 in the Xpub field and Save the changes.
You can also add a Tag [not mandatory] for your store. It's sort of like an identifier, it can help you locate the right store in case you have multiple stores.
4. Setup API Key
Copy the API Key shown on the top field of the Stores page.
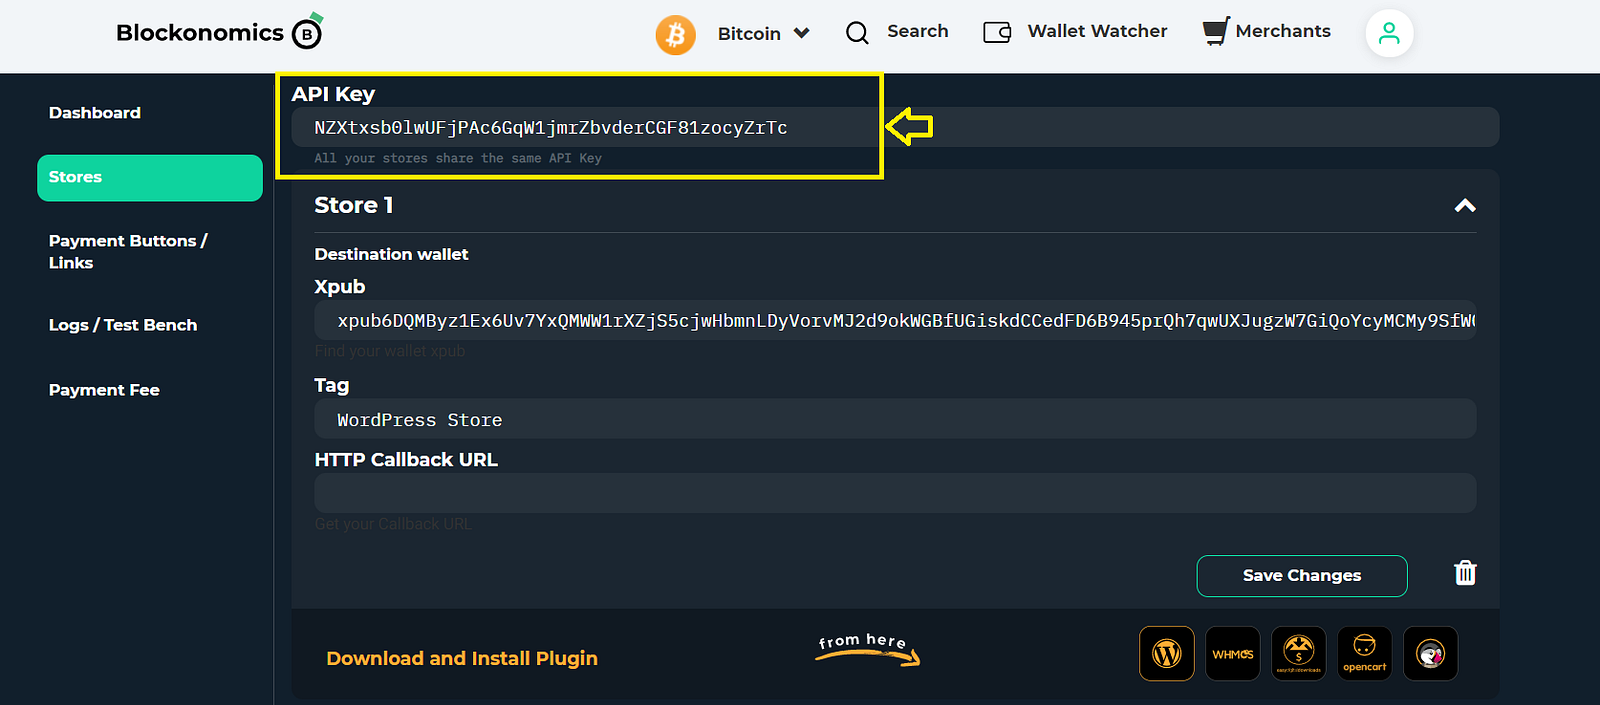
Go to WordPress Admin > Settings > Blockonomics. Paste this API Key and click on Save
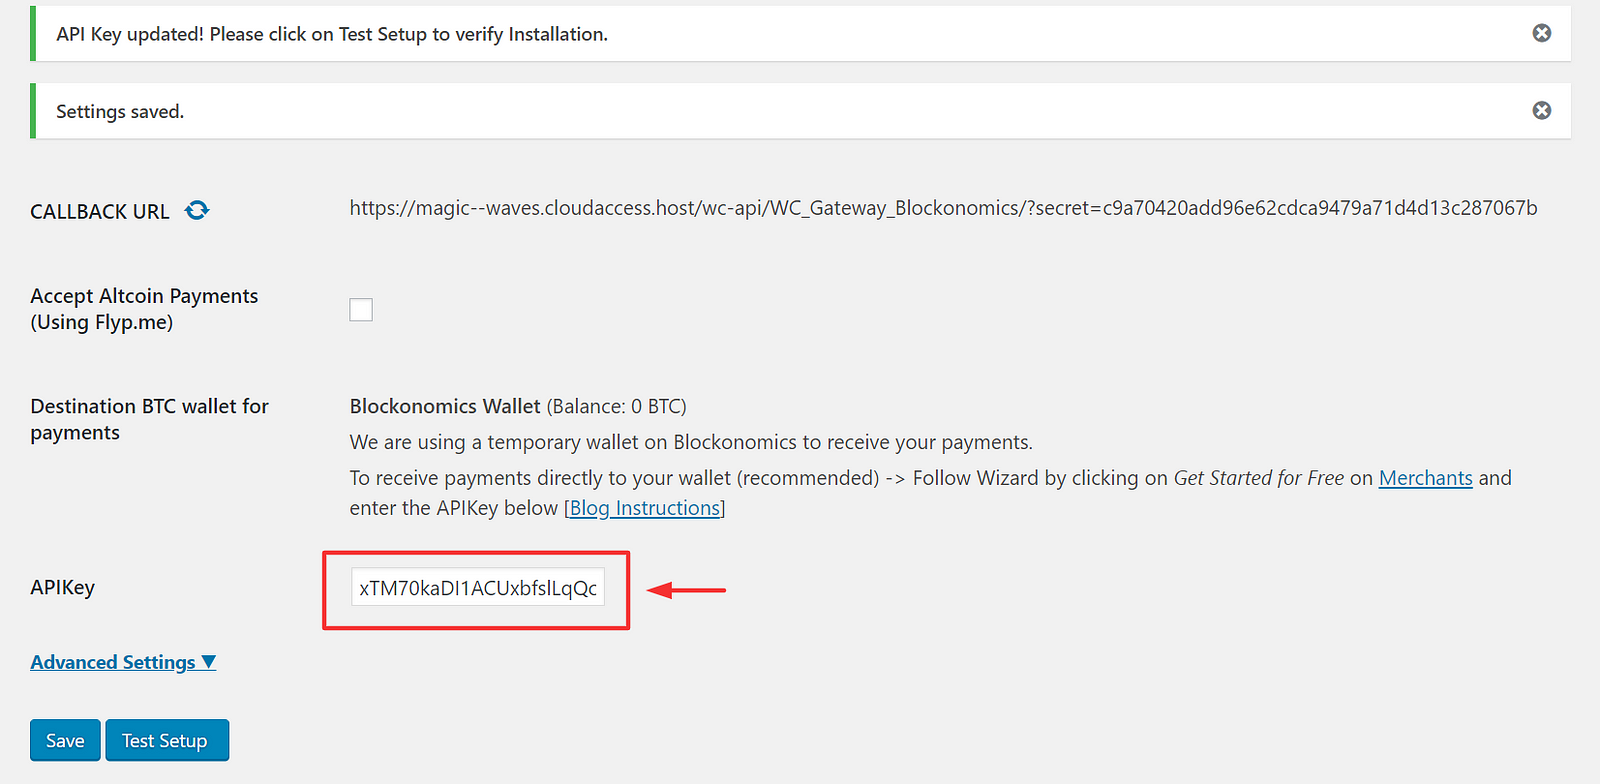
Click on Test Setup to verify the installation. That’s it — you’re officially ready to accept Bitcoins on your WooCommerce site. Feel free to do a test transaction on your front-end. Each purchase made on your site will send your Bitcoins directly to your wallet.
Congratulations and good luck!


Comments ()