How to Sell Merchandise for Bitcoin on Your Ghost Site
We’ll walk through how to set up your merchandise page and integrate Blockonomics for Bitcoin payments.
As online shopping continues to grow, accepting cryptocurrency is quickly becoming a must-have option for e-commerce merchants.This guide will walk you through the process of setting up your merchandise on Ghost site, allowing customers to pay seamlessly with Bitcoin through Blockonomics. By following these steps, you can enhance your online store's payment options and offer a modern shopping experience.
Here's a video discussing the process in detail:
Table of Contents
- Creating an Account on Blockonomics
- Linking Your Wallet
- Adding Products
- Integrating with Your Ghost Site
- Testing the Payment Process
- Confirmation Message
- Conclusion
- FAQs
Creating an Account on Blockonomics
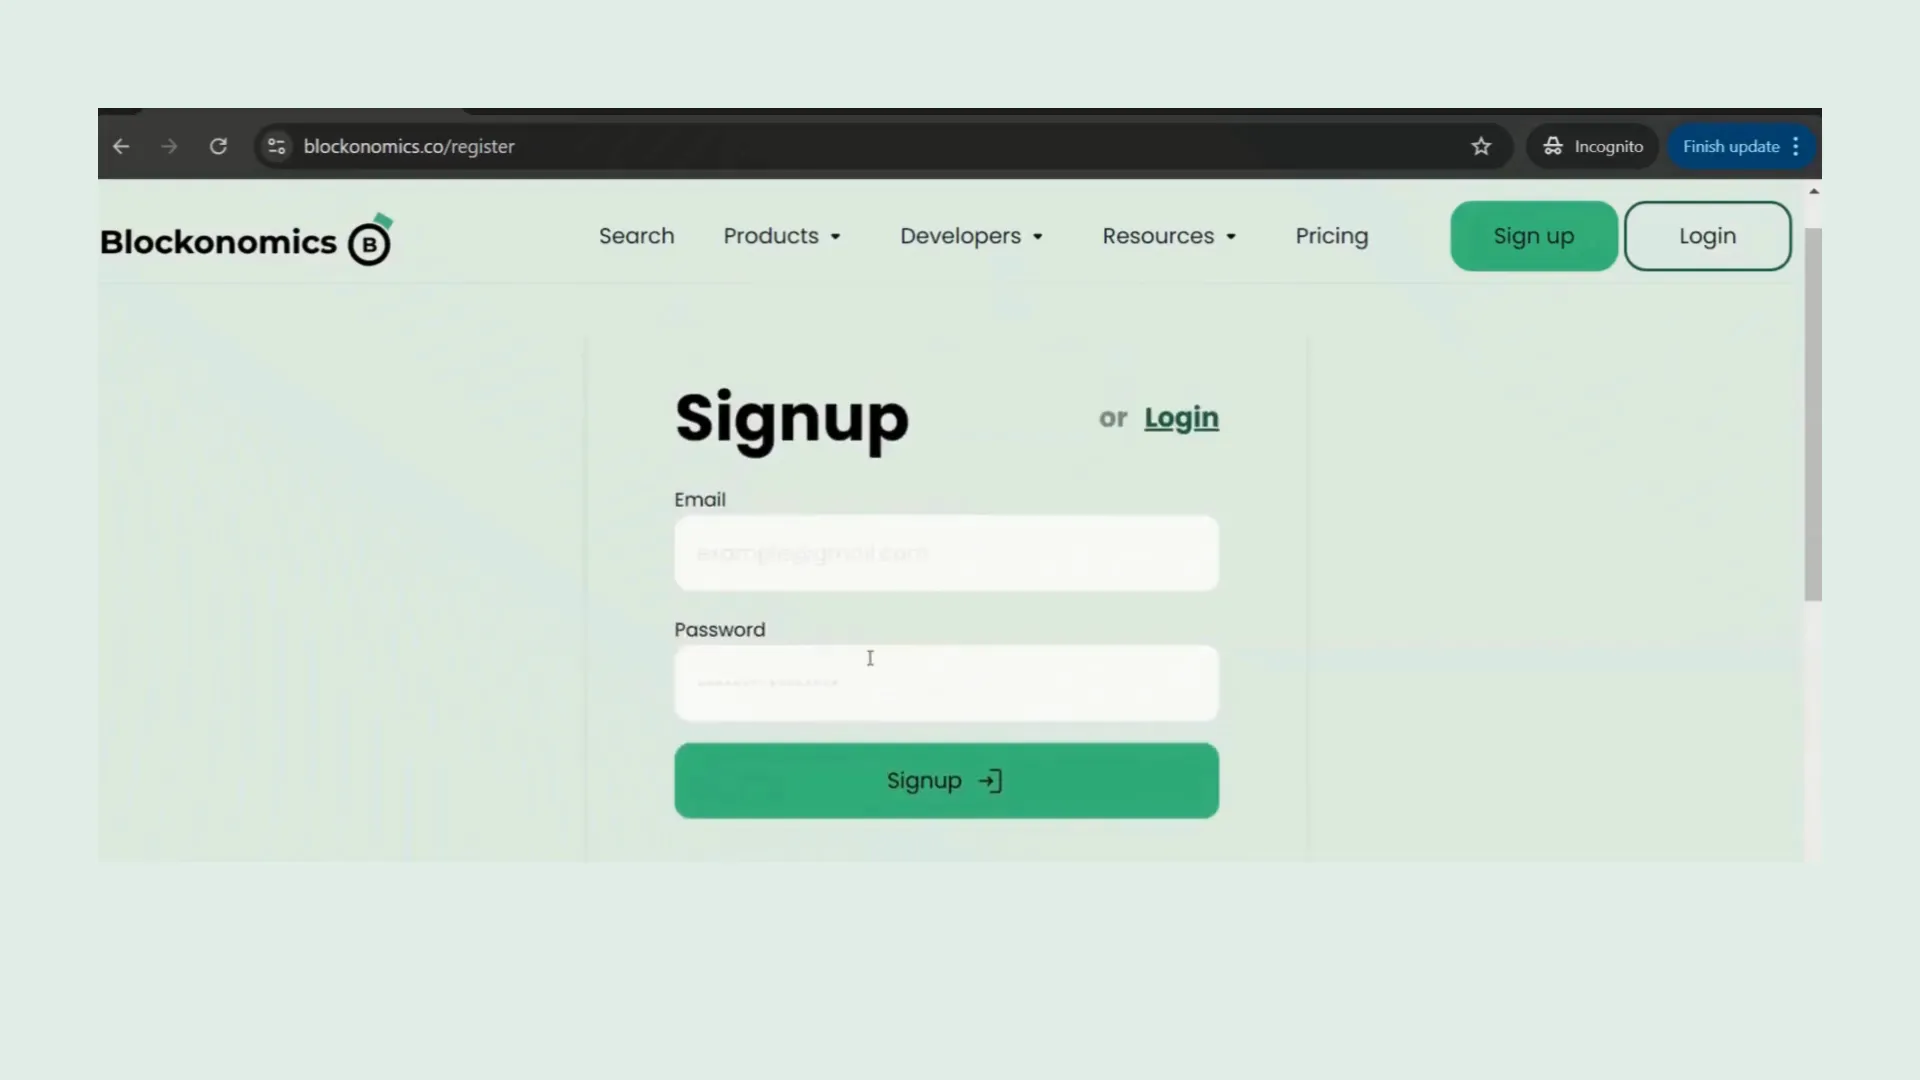
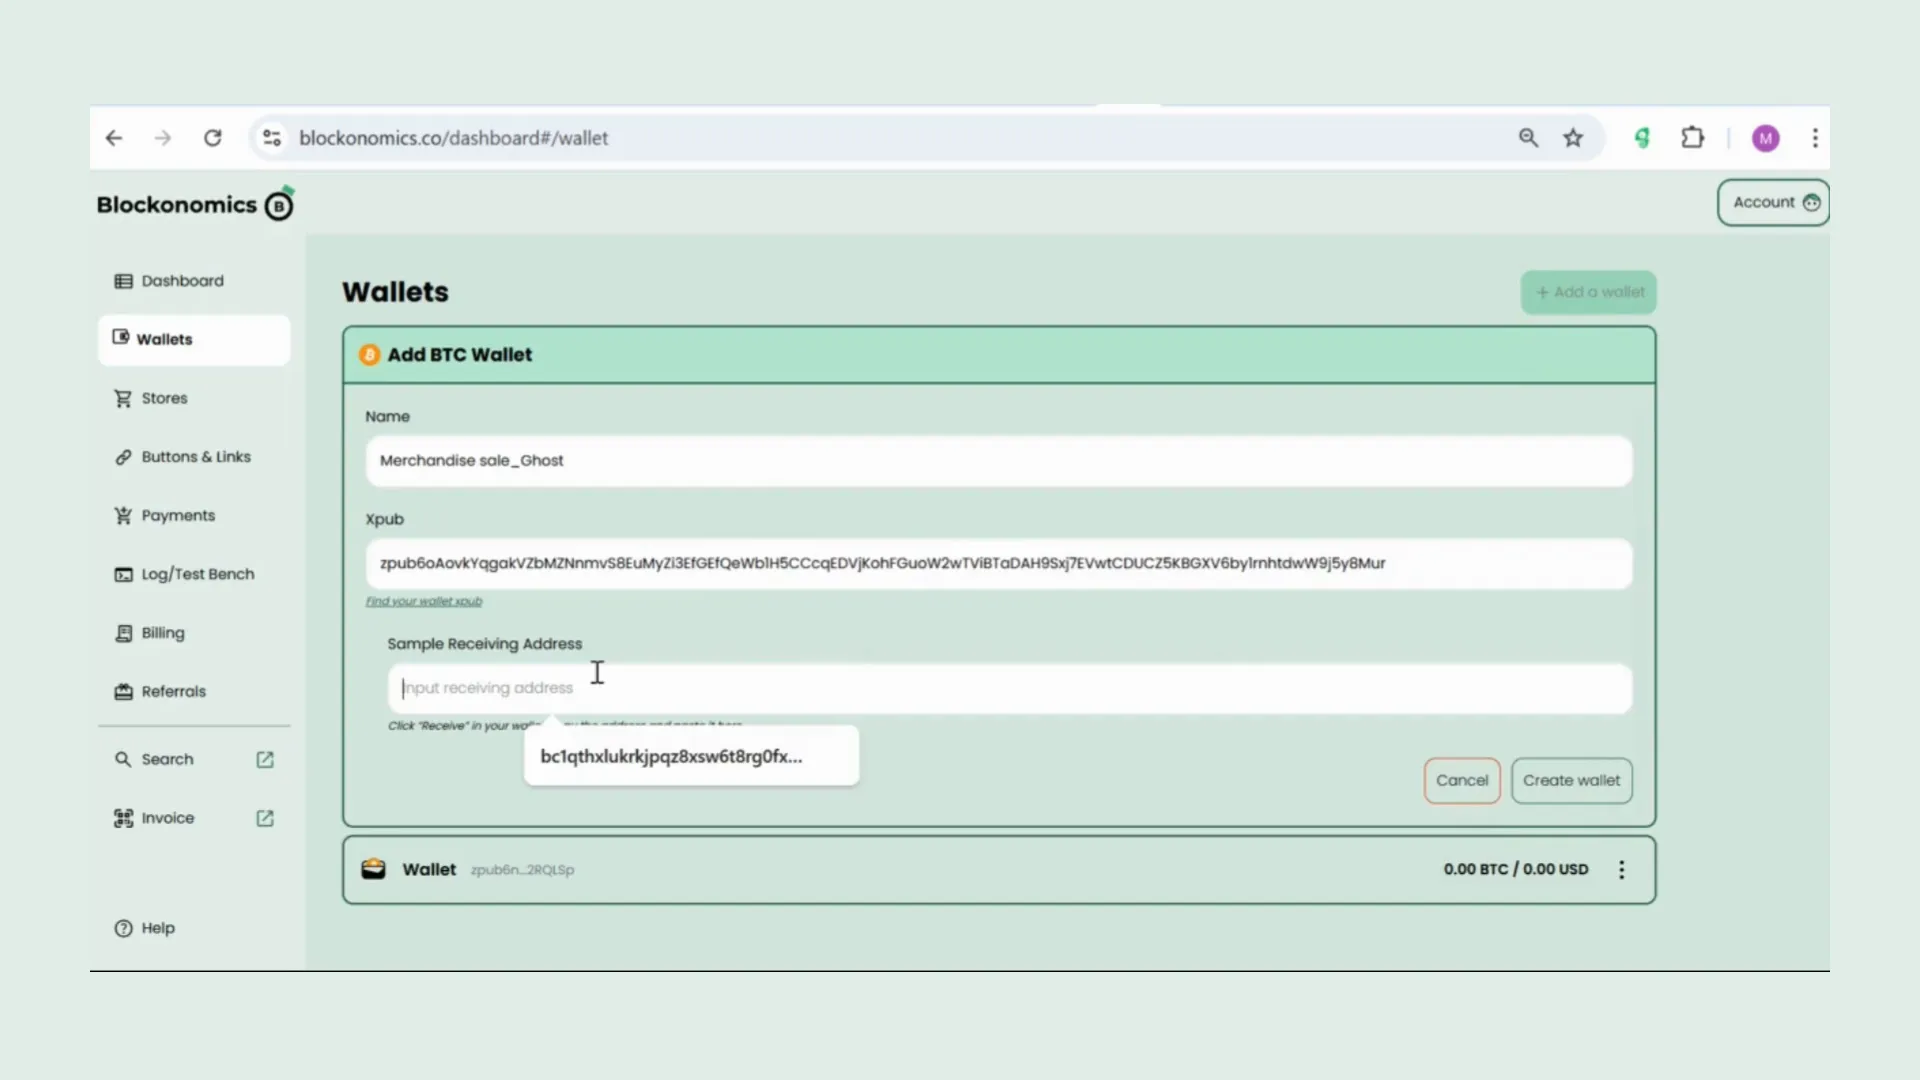
First, head over to Blockonomics. Sign up with your email address and create a password, or for an easier option, sign up using your Google account. Once you’re in the Blockonomics dashboard, navigate to the wallet tab.
Click on the option to add a wallet. For this tutorial, we'll be using the Electrum wallet. After adding the wallet information, click on "Create Wallet," and you’re all set!
Linking Your Wallet
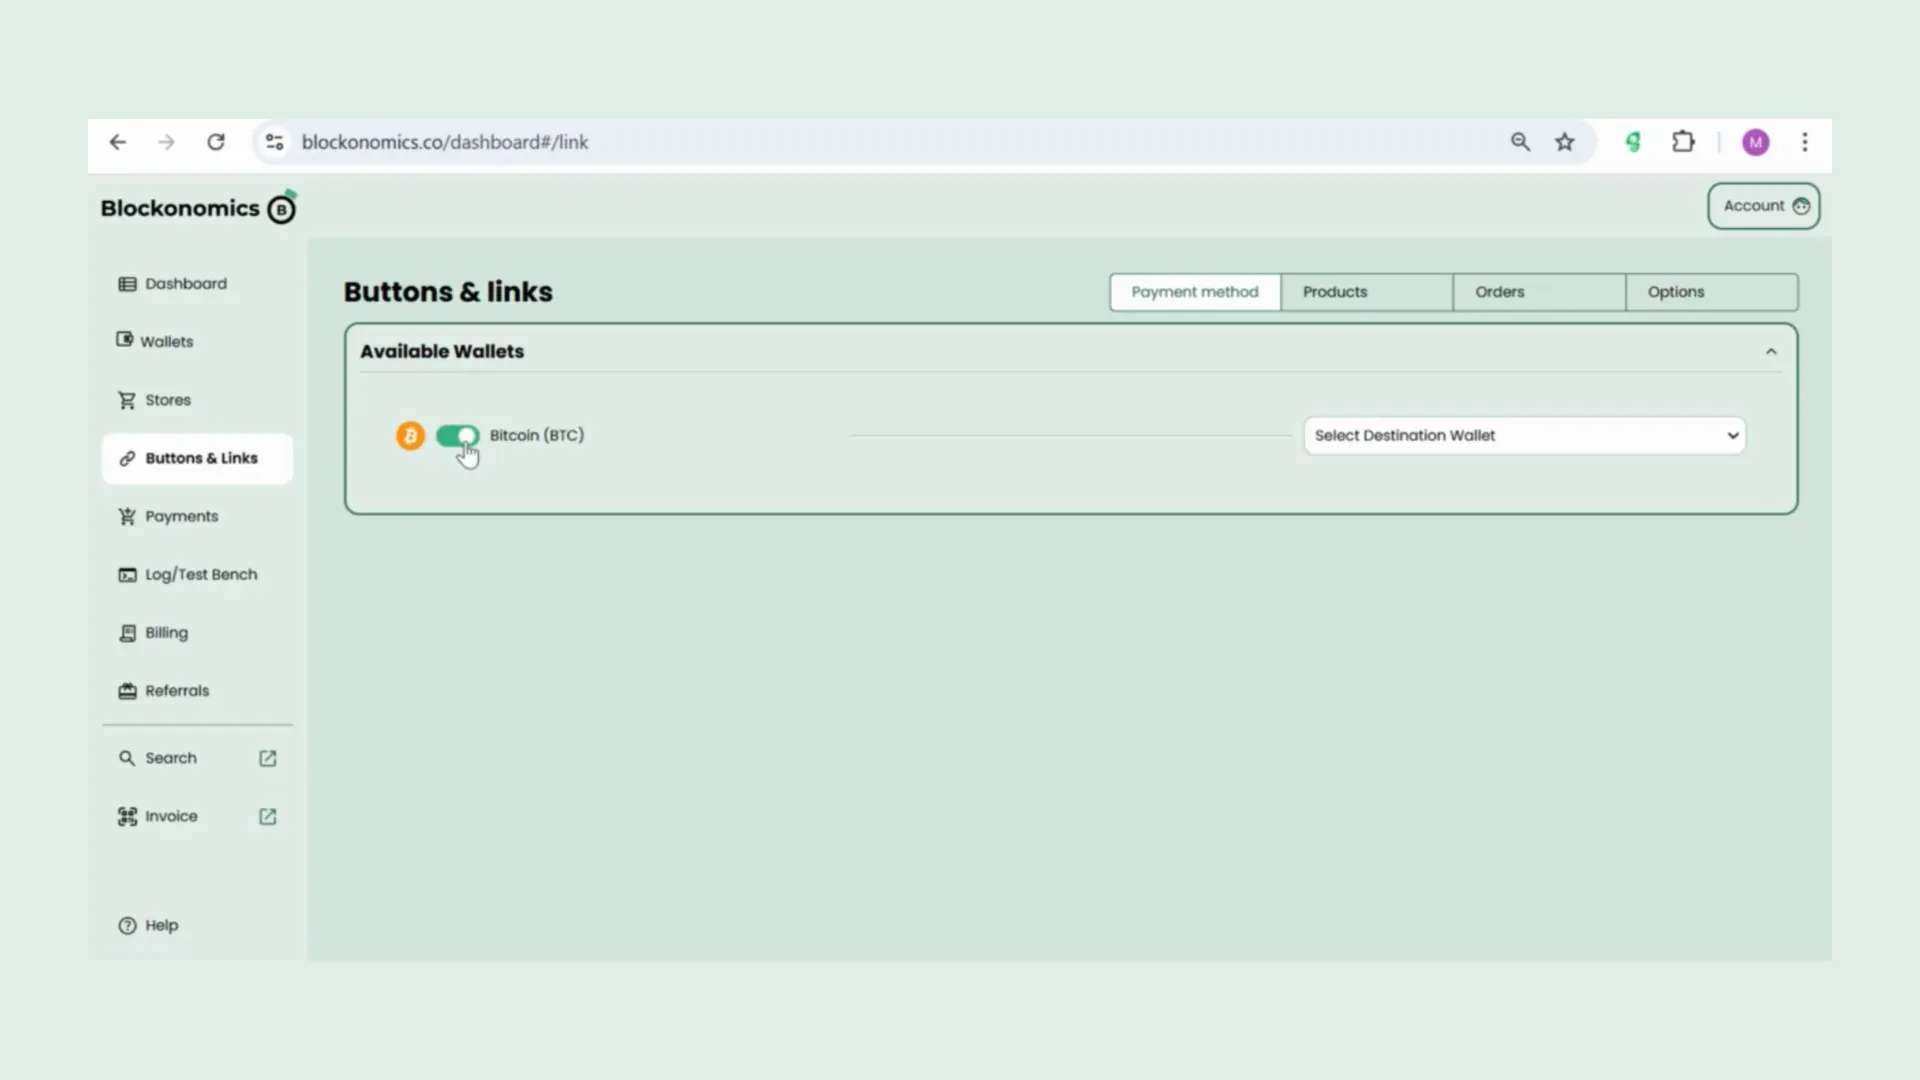
Next, return to the Blockonomics dashboard and click on 'Payment Method' under the links section. Toggle the button on for available wallets and select your destination wallet. Your wallet is now linked!
Adding Products
Now, let’s add a product. Click on the 'Products' tab and then click 'Add a Product.' For instance, let’s add a solid black t-shirt. Set the price at $2.99. Next, set up a confirmation email that your customers will receive after payment.
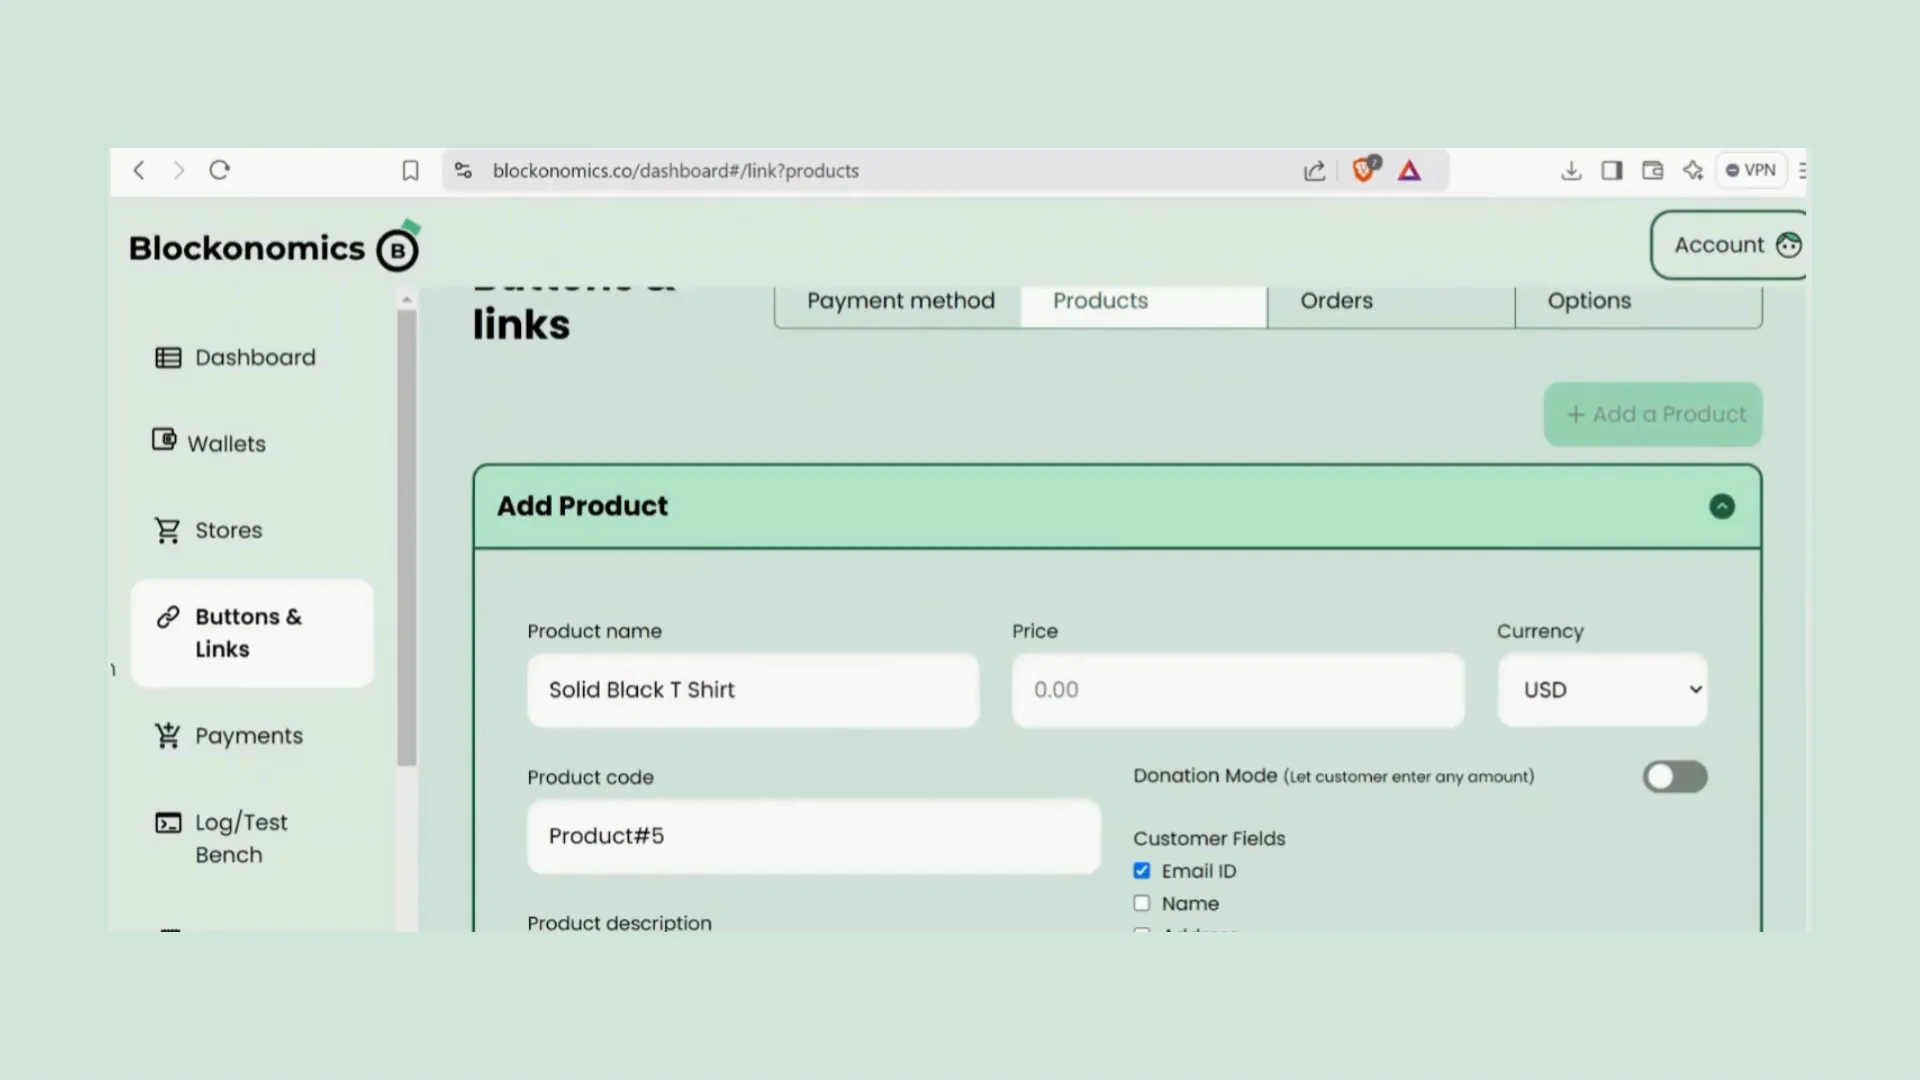
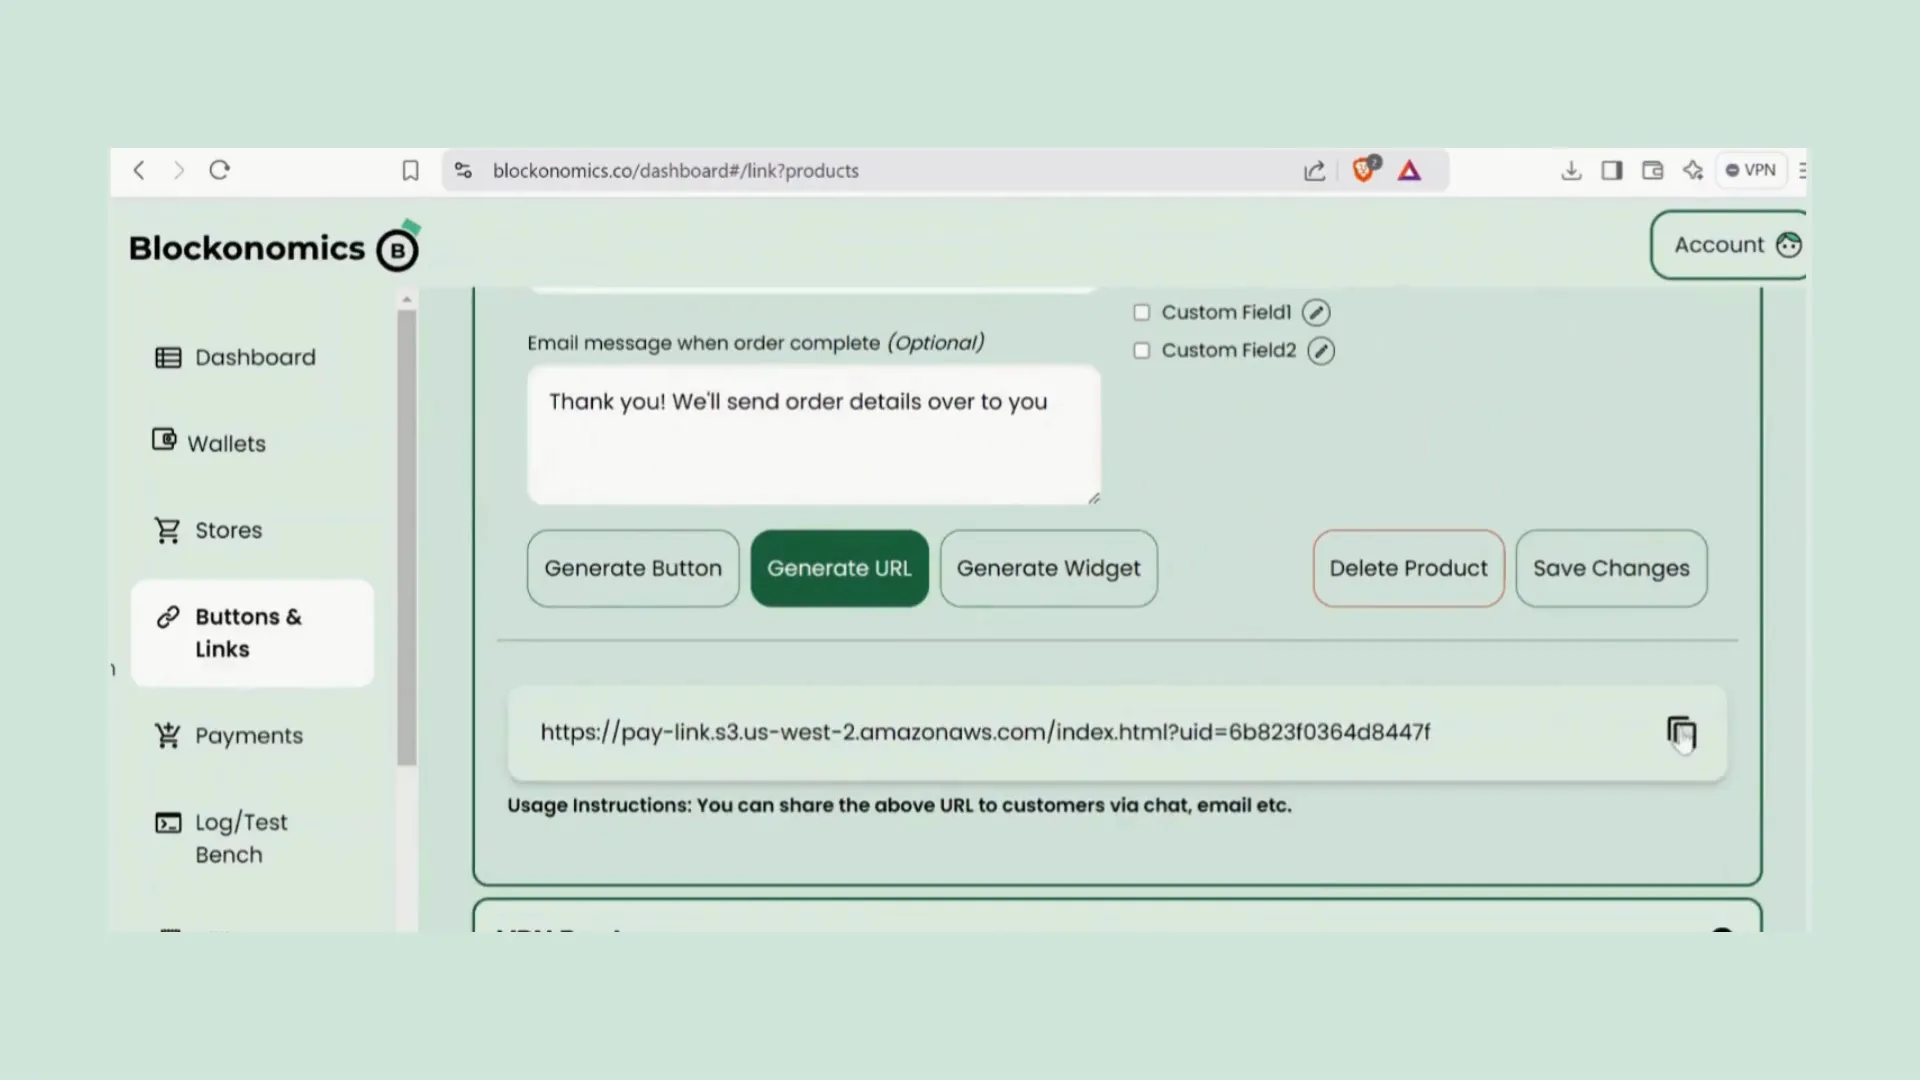
We will then customize the customer fields that will be displayed on the payment page. Click on 'Save Changes' and you’ve just set up a product. Open the product you created and click on 'Generate URL.' Copy that URL.
Integrating with Your Ghost Site
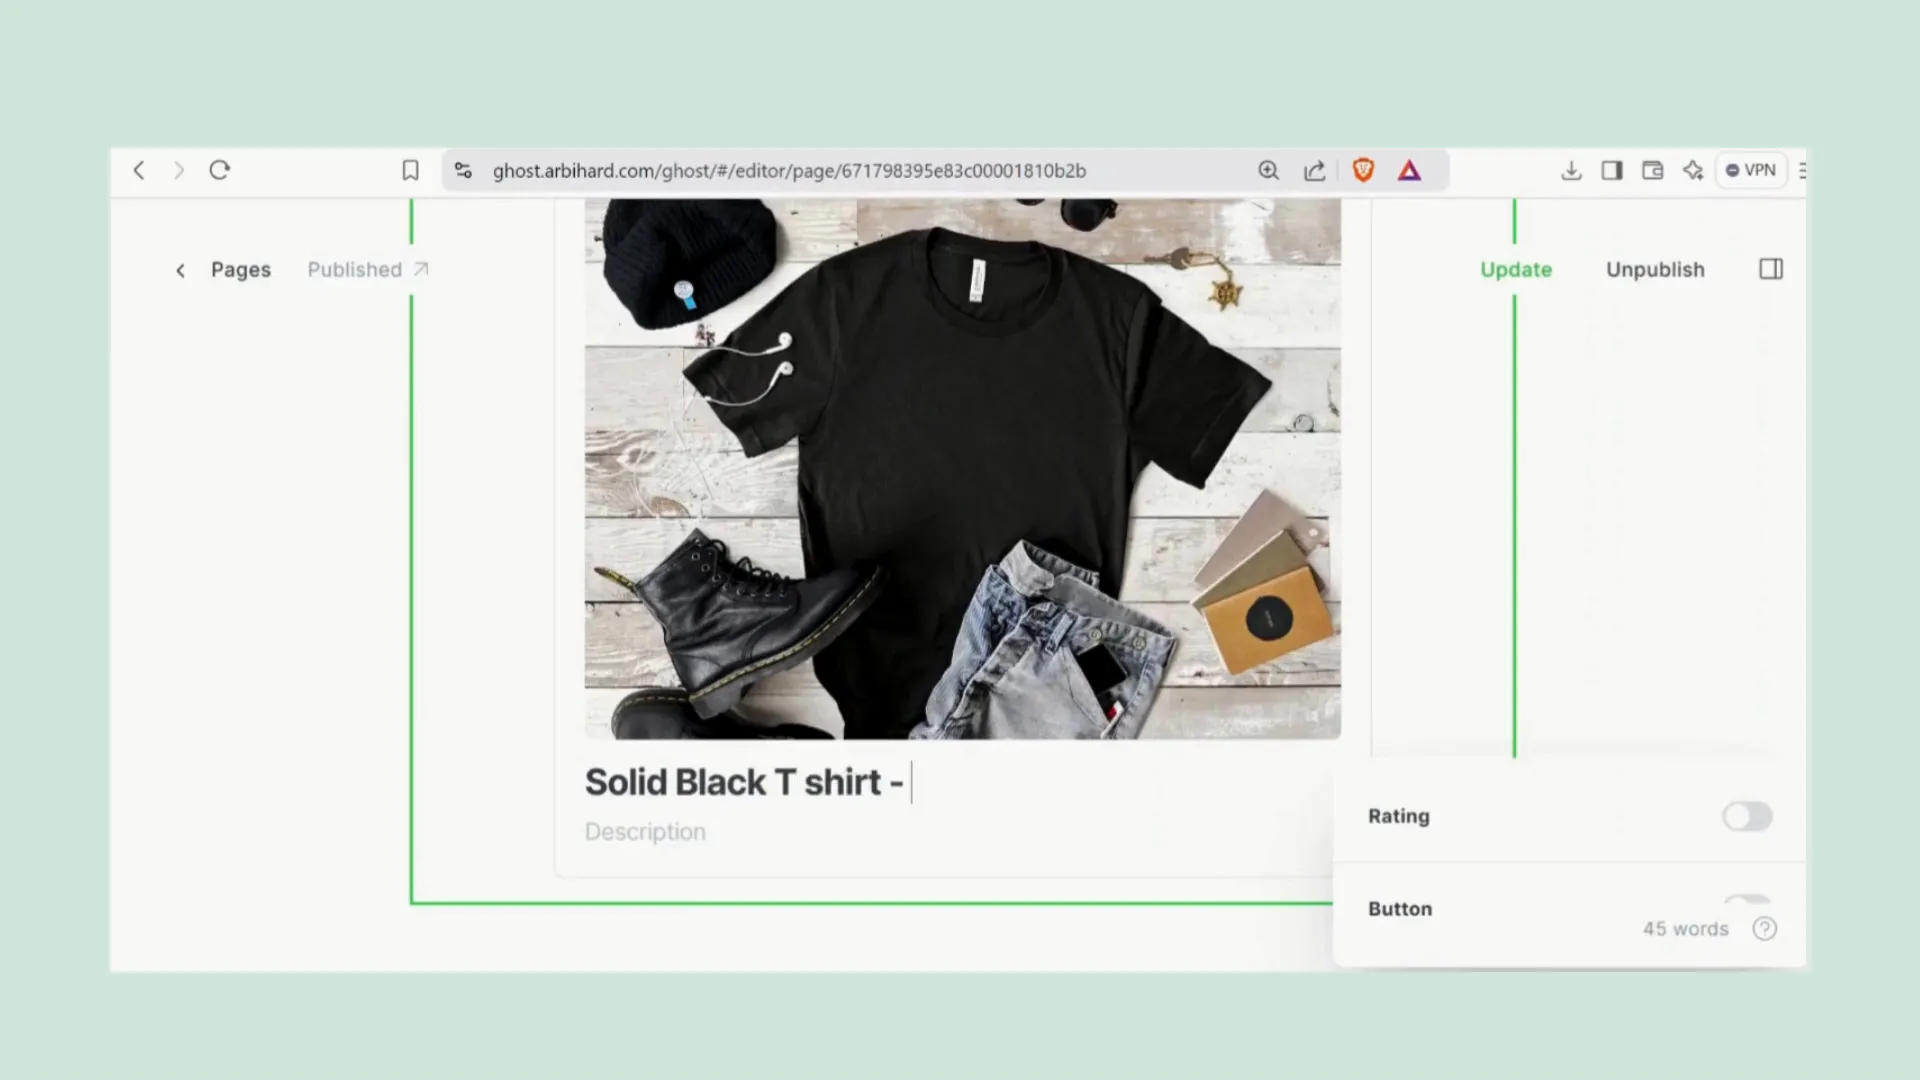
Head over to your Ghost site. Click the plus button and choose the product you want to add. Add the product image, title, and description. Once that’s done, click on the holder. When you click on the pen button, you’ll have the option to choose the button URL. Paste the link you copied from Blockonomics product settings and click 'Update.' Your site is now updated!
Testing the Payment Process
Now, let’s add the required information in the checkout process and click the "Pay with Bitcoin" button. The payment page will display the Bitcoin address and the amount to be sent.
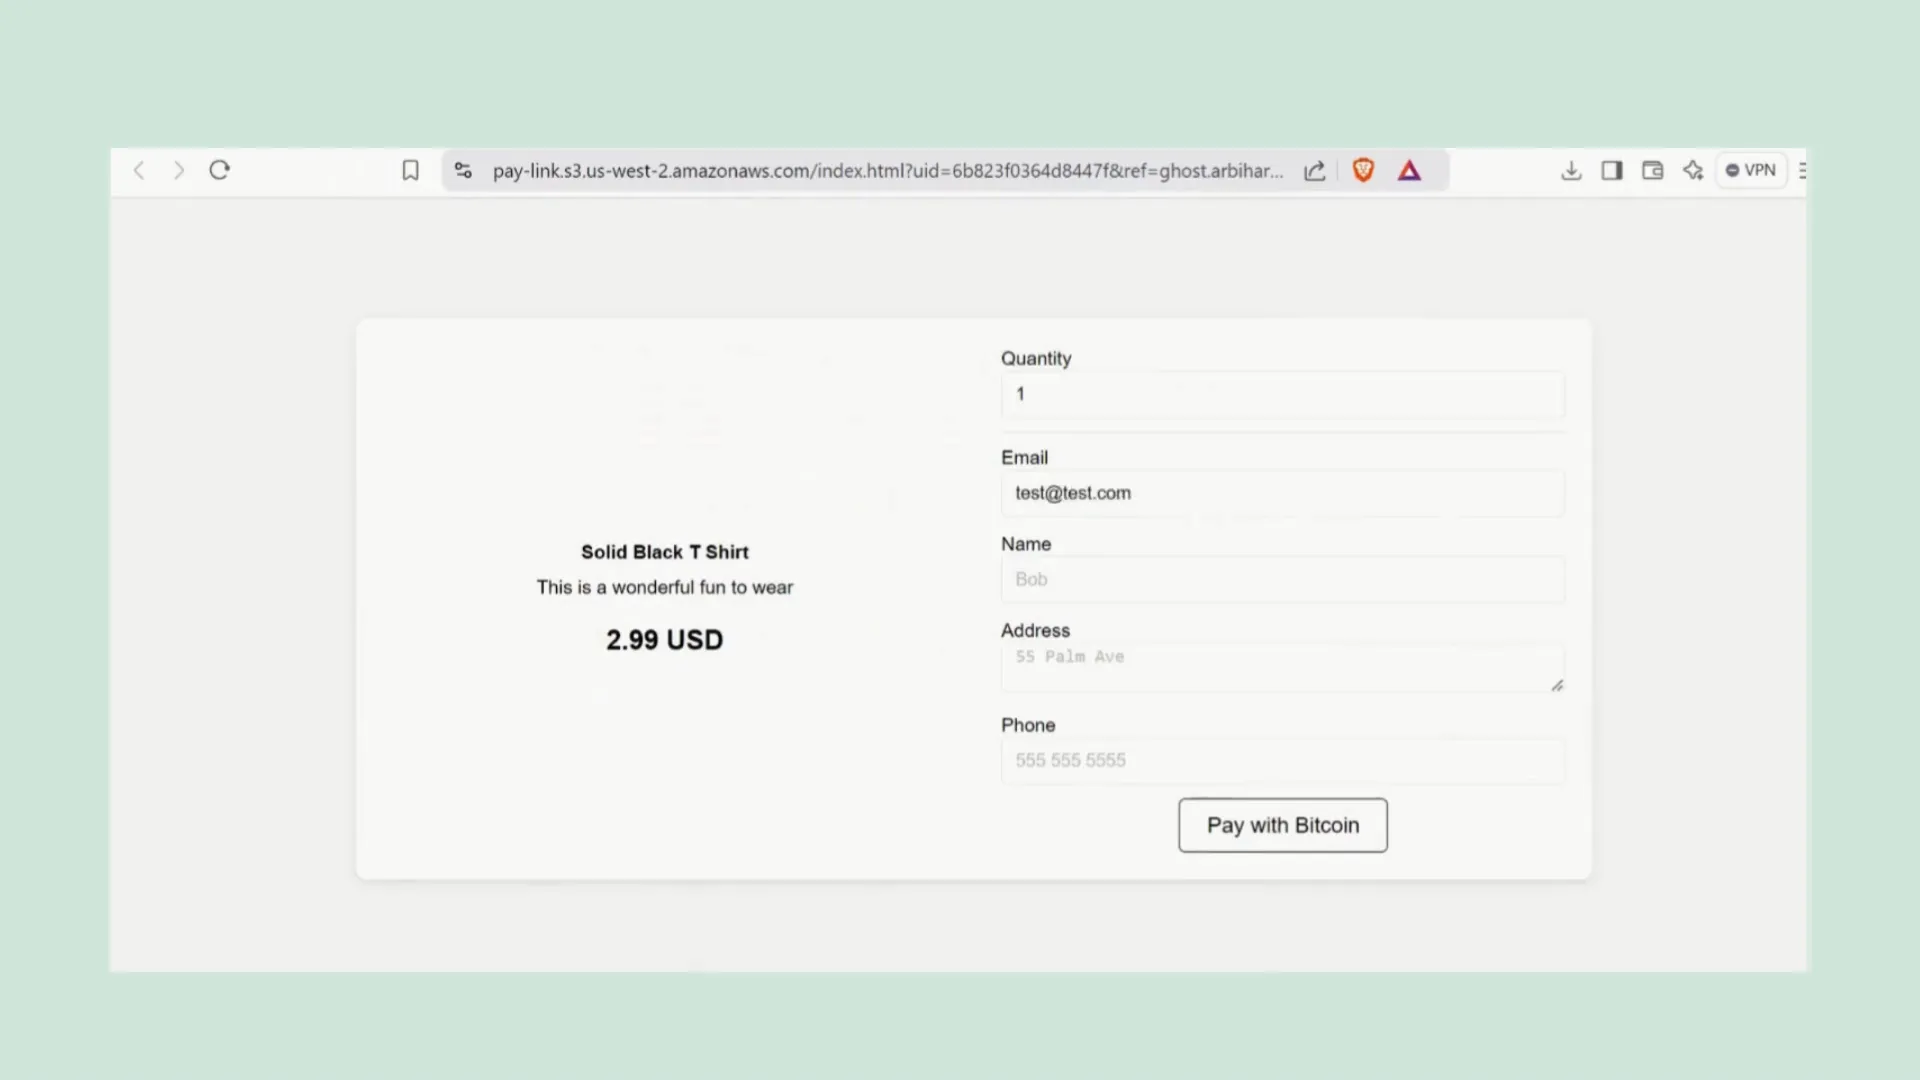
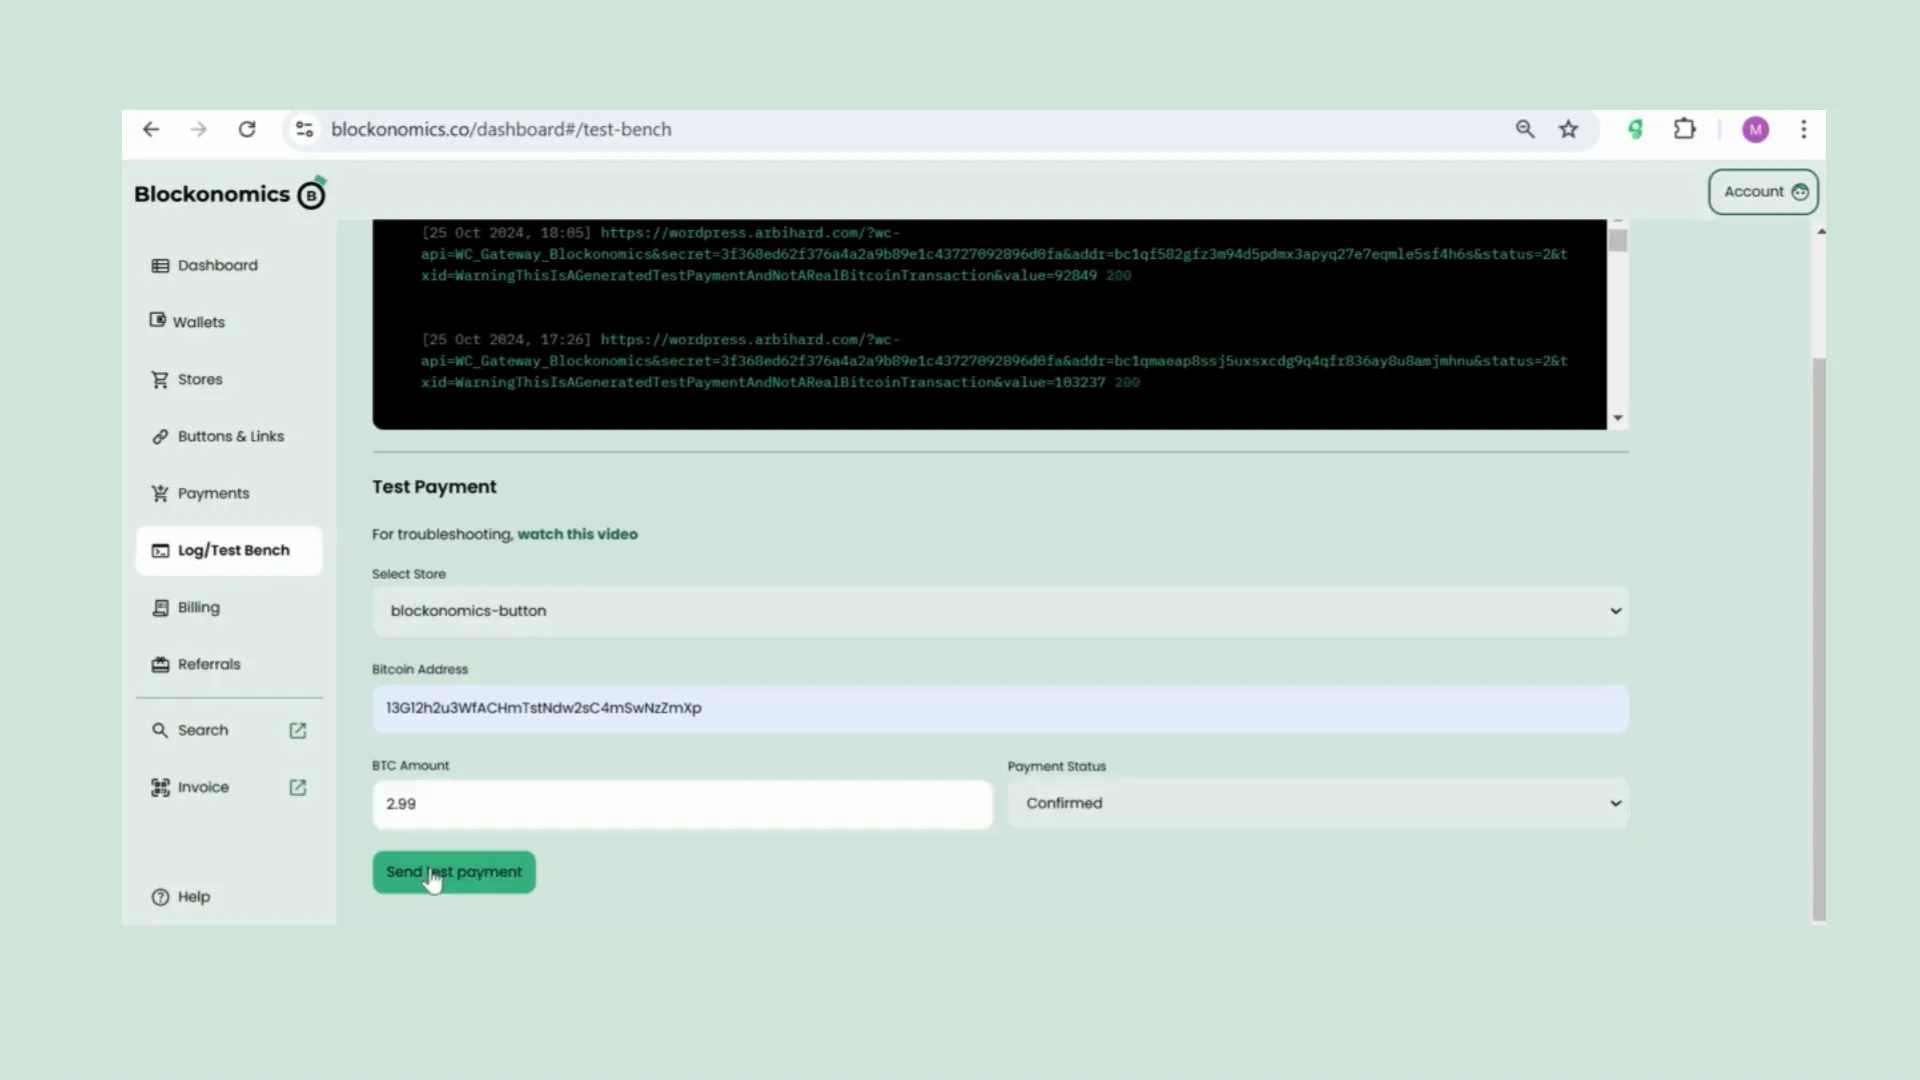
Now, let’s head back to the Blockonomics dashboard. On the left side, find 'Log or Test Bench' under 'Store.'Select 'Blockonomics Button,' paste the Bitcoin address and the amount you saw on the payment page, and ensure you mark the payment status as confirmed. Hit 'Send Test Payment.' That’s executed successfully!
Confirmation Message
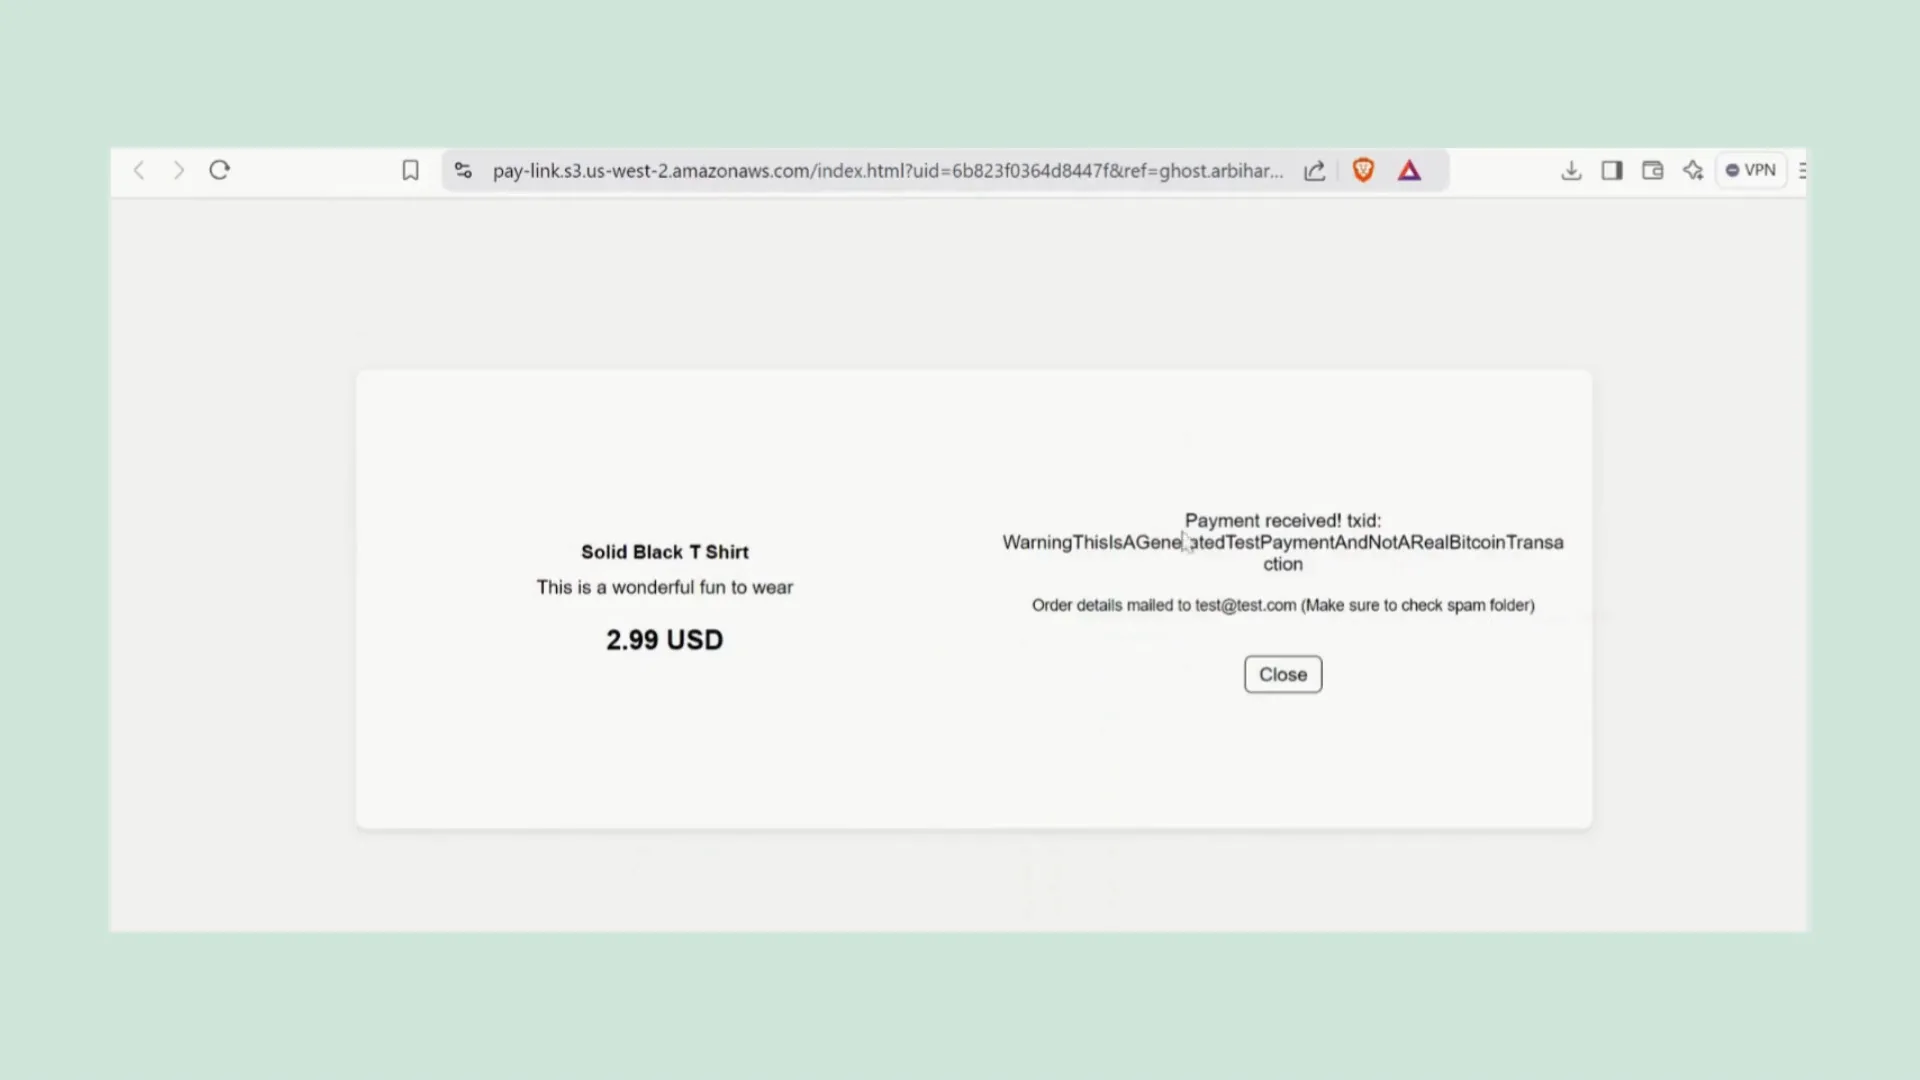
Next, let’s return to the payment page and check the confirmation message. You should see the confirmation displayed there. As a site owner, you can find all the details in your Blockonomics dashboard under 'Buttons and Links' in the ERS tab. All your information is right there!
Conclusion
That's all there is to it! If you have any questions, feel free to reach out to us here. We're always happy to help. Thank you for using Blockonomics!
FAQs
Do I need to provide personal information to use Blockonomics?
No, Blockonomics does not require KYC (Know Your Customer) information, ensuring your privacy.
What wallets are supported by Blockonomics?
Blockonomics supports various wallets, including Electrum, Trezor, and Ledger, among others.
Can I test the payment process before going live?
Yes, Blockonomics provides a test bench feature that allows you to send test payments to ensure everything is functioning correctly.



Comments ()